DaDesktop for Participants: How‑To Guide
Objective
This guide is designed for participants (students) looking to attend a course run on DaDesktop.
Overview of DaDesktop
DaDesktop is a cloud platform built specifically for IT education. It serves both instructors and learners by providing virtual desktops powered by the innovative DaDesktop® technology. In each session, every participant gets a complete online desktop environment where they can work on exercises under the trainer's supervision.
Its three main parts are:
- Management Console – a web-based interface for system administration, such as starting and stopping cloud desktops, etc.
- Training Room – a collaborative area for sharing the remote desktop, audio communication, chat, lesson recording, and more.
-
Remote Desktop – a virtual machine (either Windows or Linux); each user gets their own machine.
Requirements
Whether you plan to join from your office or home, you will require:
- A computer (desktop or laptop) with a stable internet connection (minimum 10 Mbps download, 1 Mbps upload). Windows, Mac, and Linux are all supported.
- Chrome or Firefox web browser
- A high‑quality microphone or headset (using a phone is a last resort and not recommended)
-
A quiet environment with no external distractions or background noise (a coffee shop won’t work)
Recommended:
- Webcam
- A second monitor: use one screen to follow the instructor, and the other to access your DaDesktop virtual machine for hands‑on labs.
- Turn off any VPN before connecting to the course
- If possible, disable any security software that might interfere with the network connection
- Use a wired Ethernet connection if available; if using Wi‑Fi, run an internet speed test beforehand (e.g., speedtest.net)
You might want to join the course early to test your DaDesktop virtual classroom before the actual start date. Note that on days prior to the course, you can only access the desktop for a 15‑minute period.
Course Access
Please be aware that access to your course outside of scheduled days is limited to a 15‑minute window.
On the actual course days, you can access it all day long. Previously, this was only available about an hour before the course started.
Keeping Your Desktop After the Course Ends
A key benefit of DaDesktop is that course participants are given the option to continue to use their machine once their course finishes.
Refer to the link above for complete instructions.
Joining a Course
Click the link provided by your coordinator (e.g., dd4t.dadesktop.com/da/join/xxxxx).
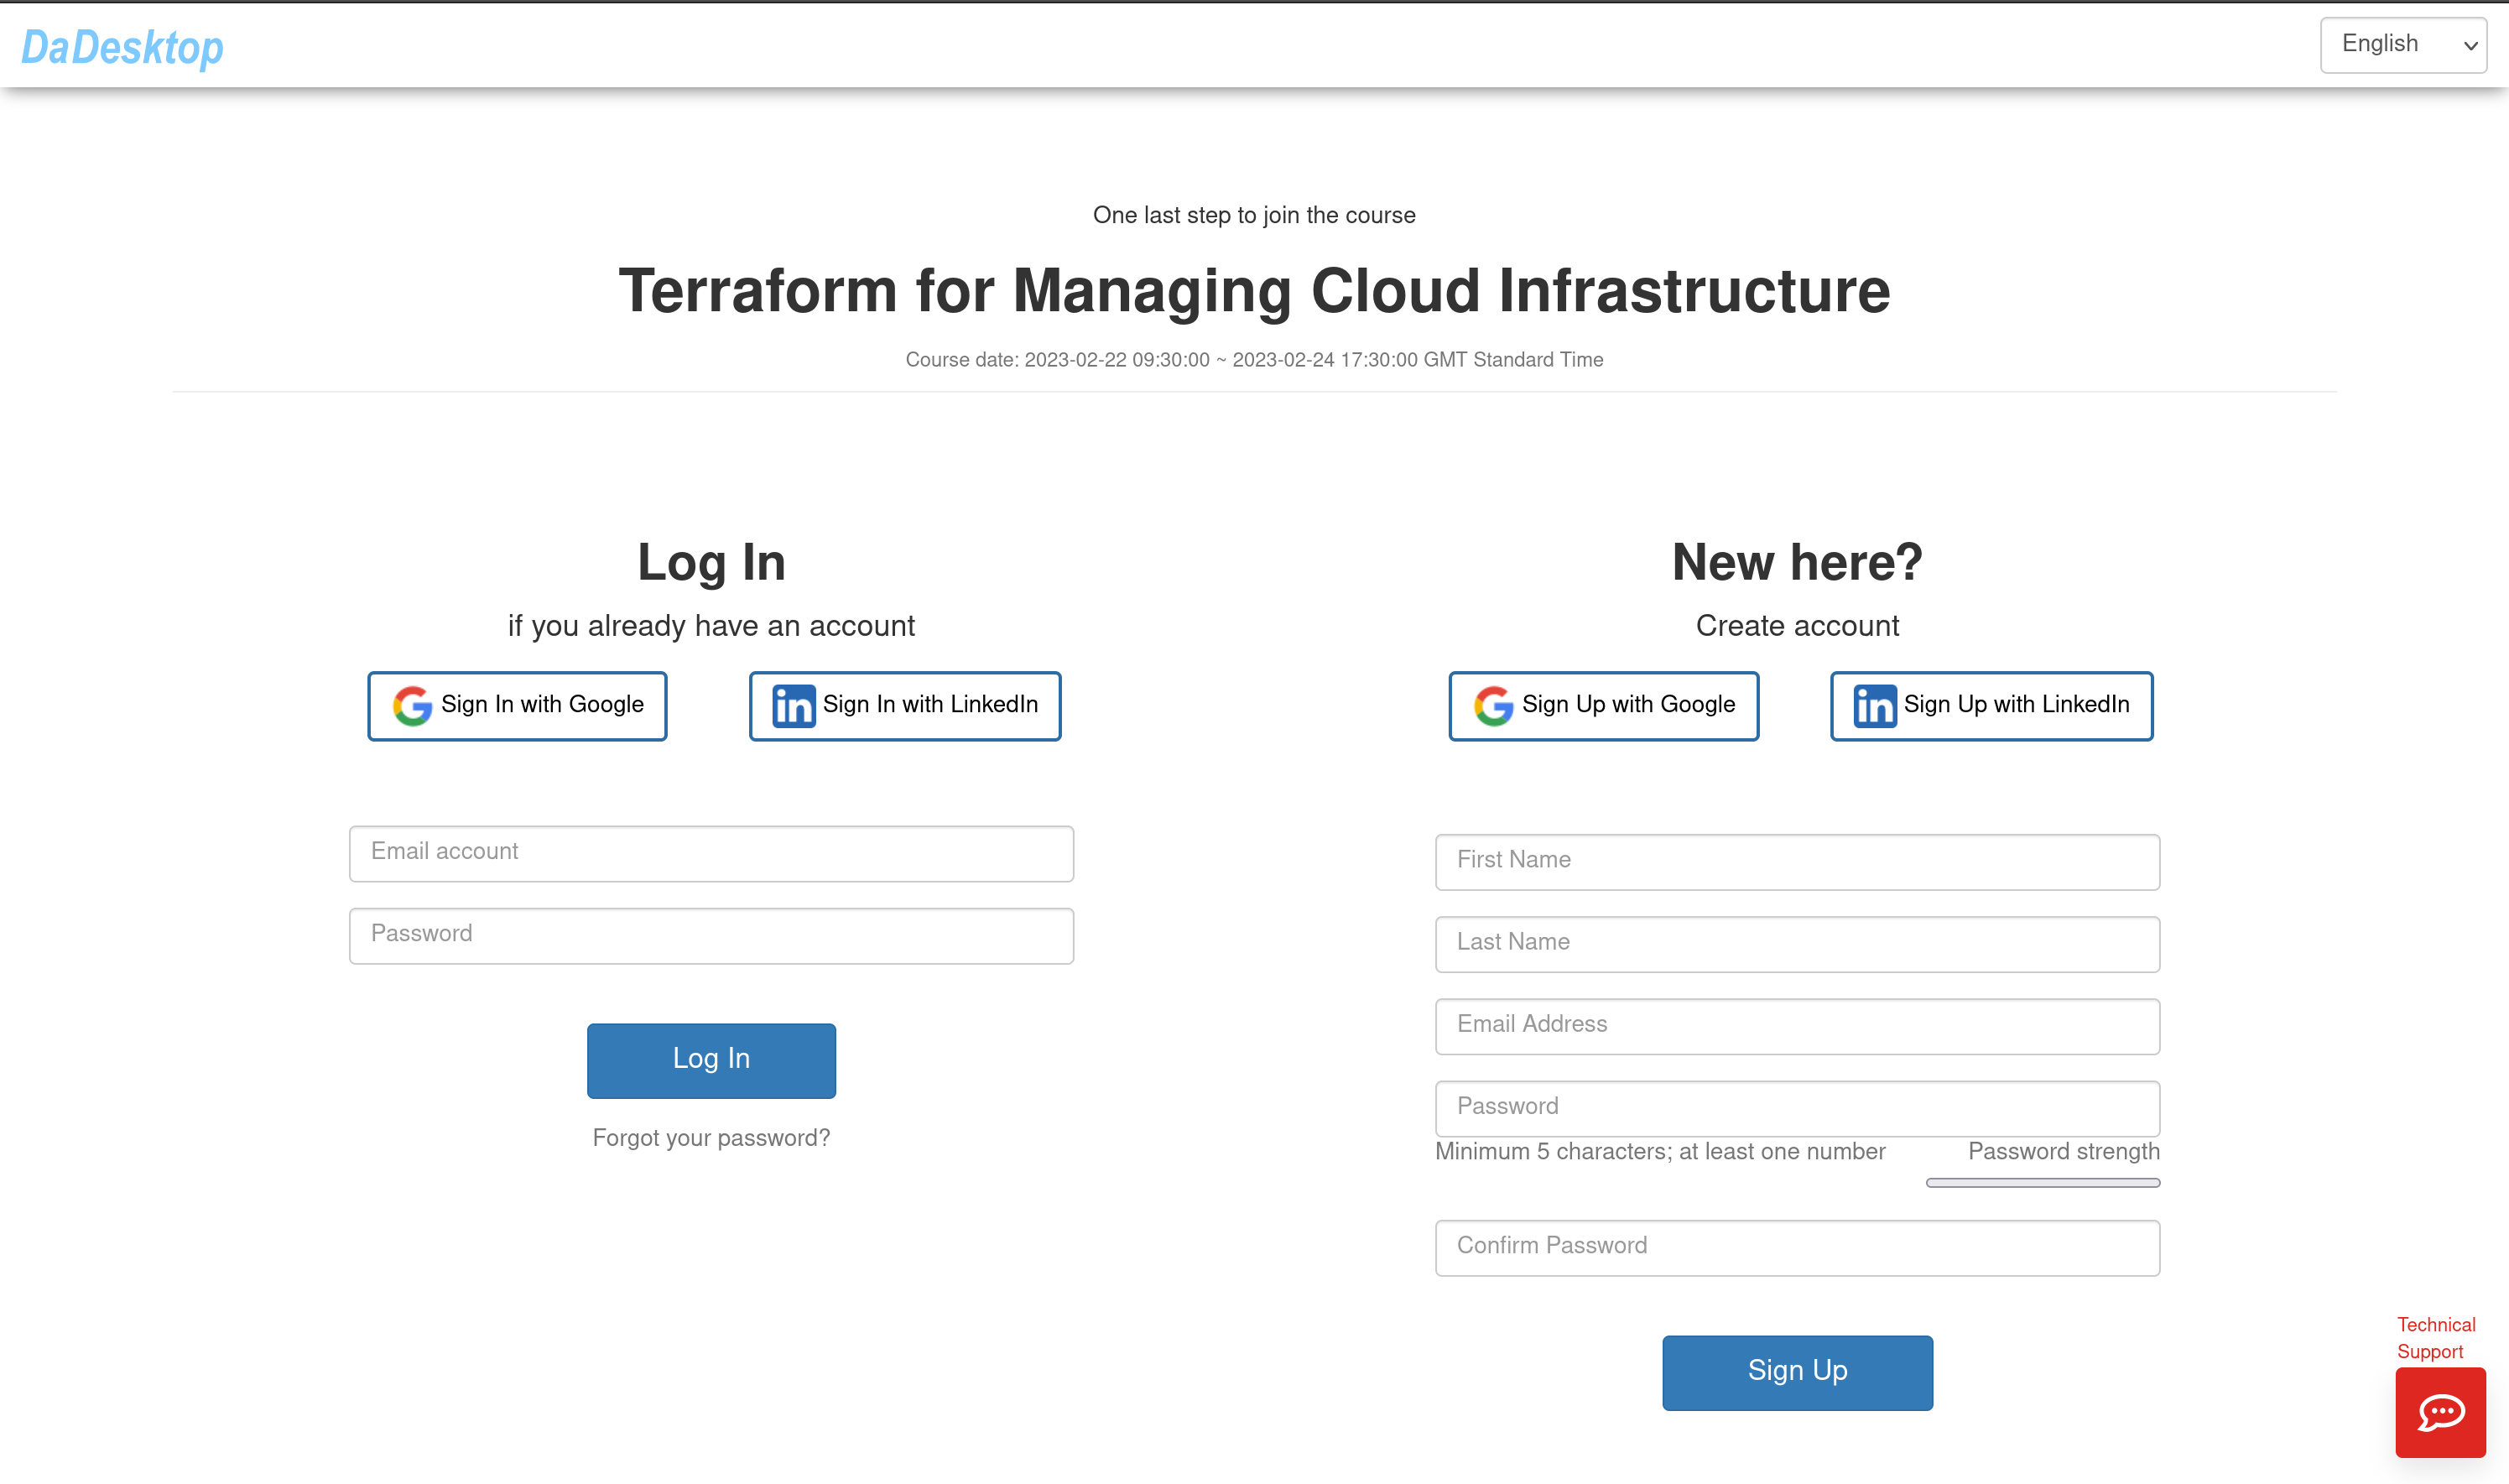
Image 01
If this is your first time, fill in your information under "Account" and click “Sign Up”. You can register using the form or by signing in with a Google or LinkedIn account.
If you already have an account, simply log in.
You’ll then be taken to the Management Console for your course.
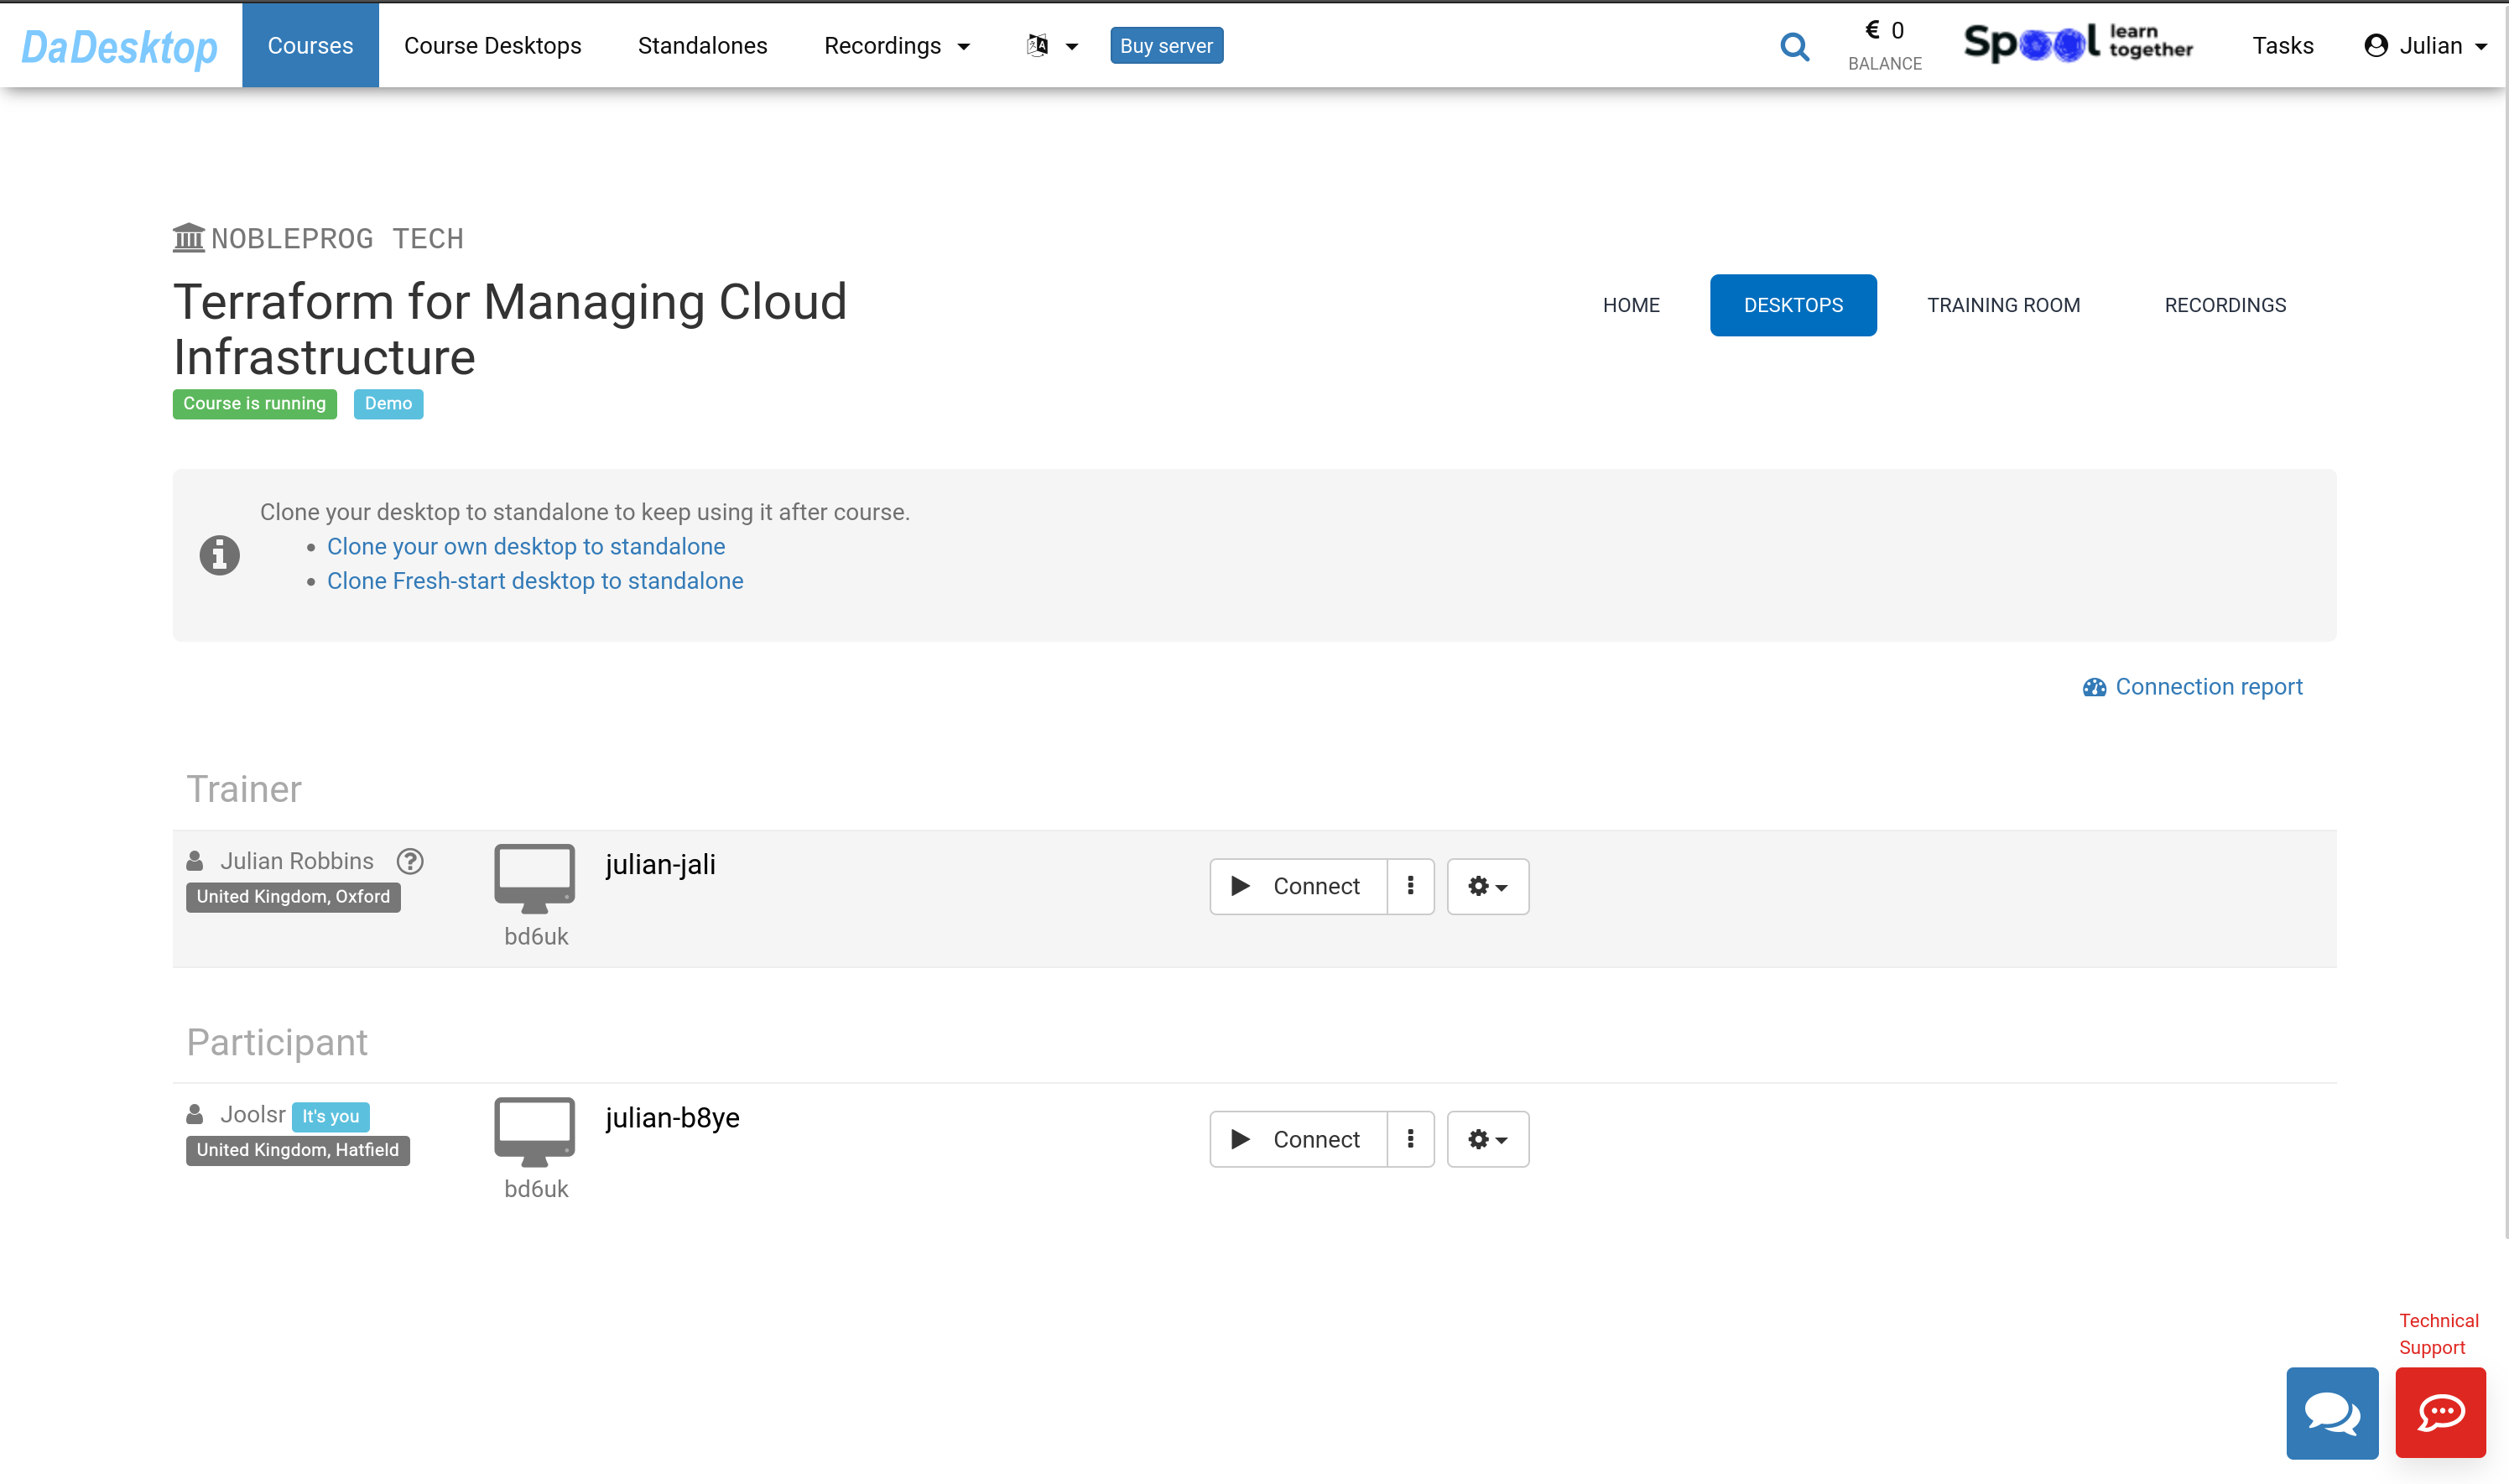
Image 02
Using the Management Console
Select the "TRAINING ROOM" tab.
Click the "Join Training Room" button.
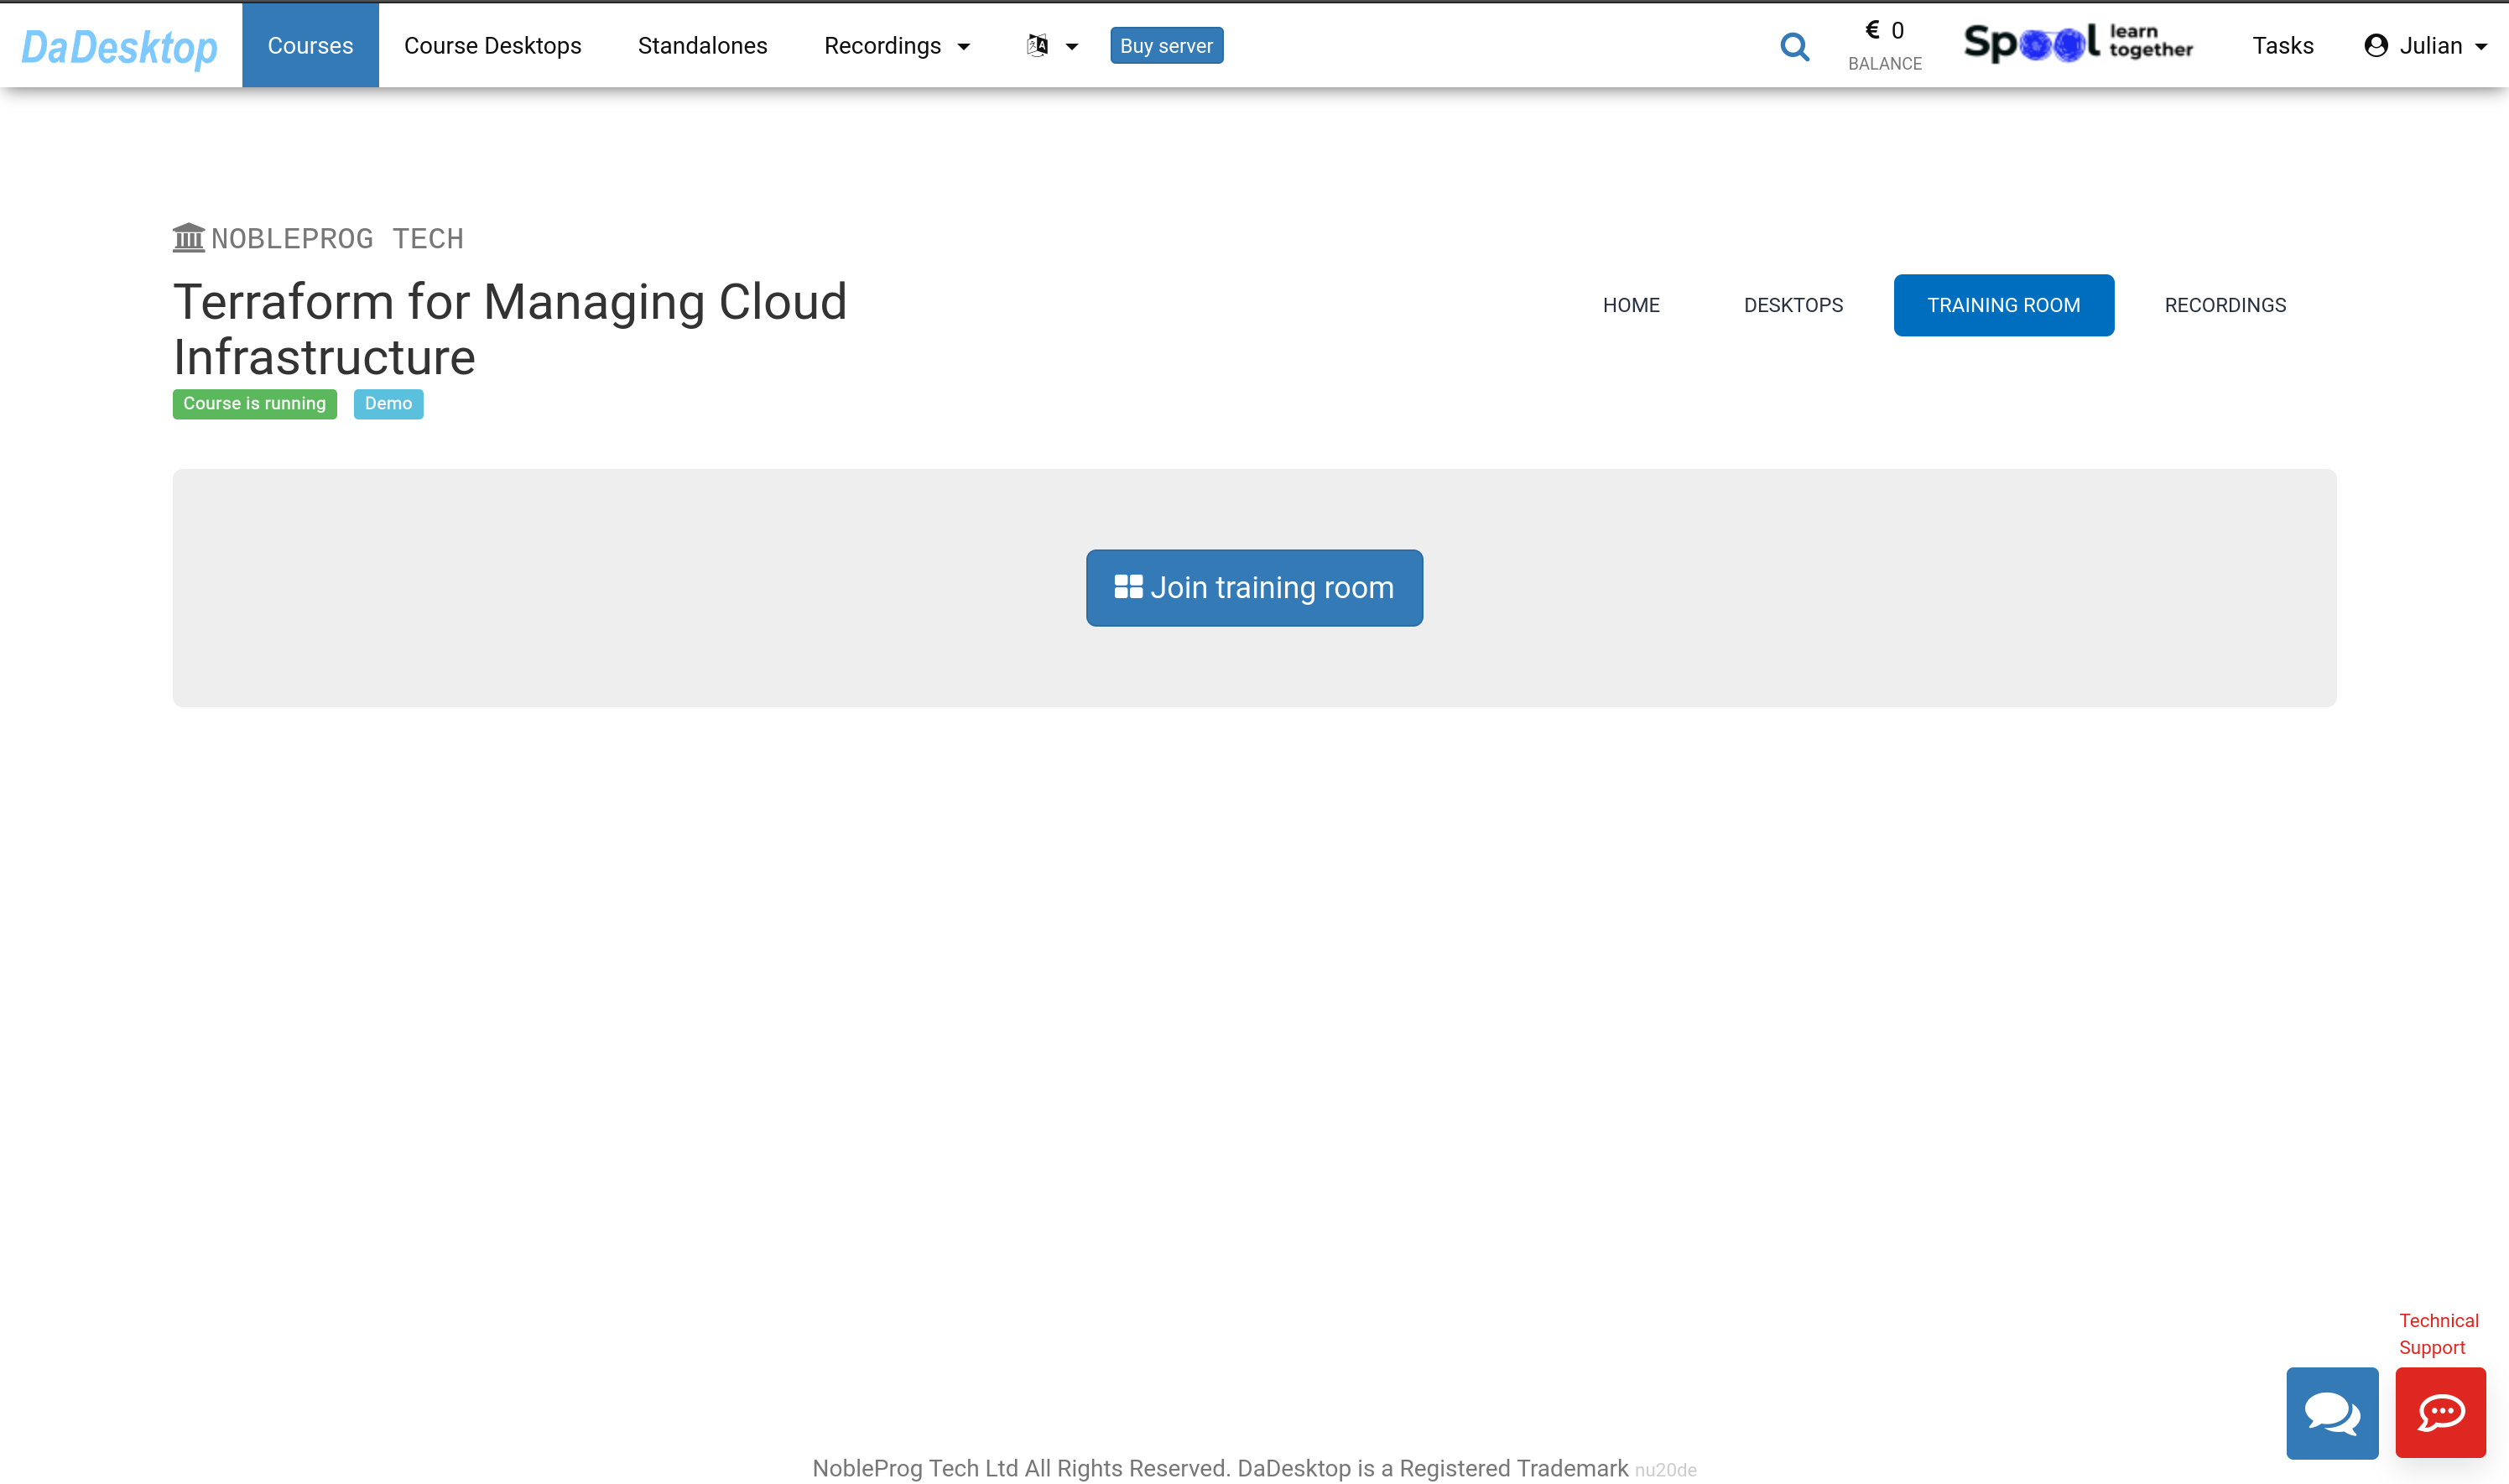
Image 03
The Virtual Training Room will launch in a new browser window. A pop‑up will ask permission to copy content to the clipboard. Click "Allow".
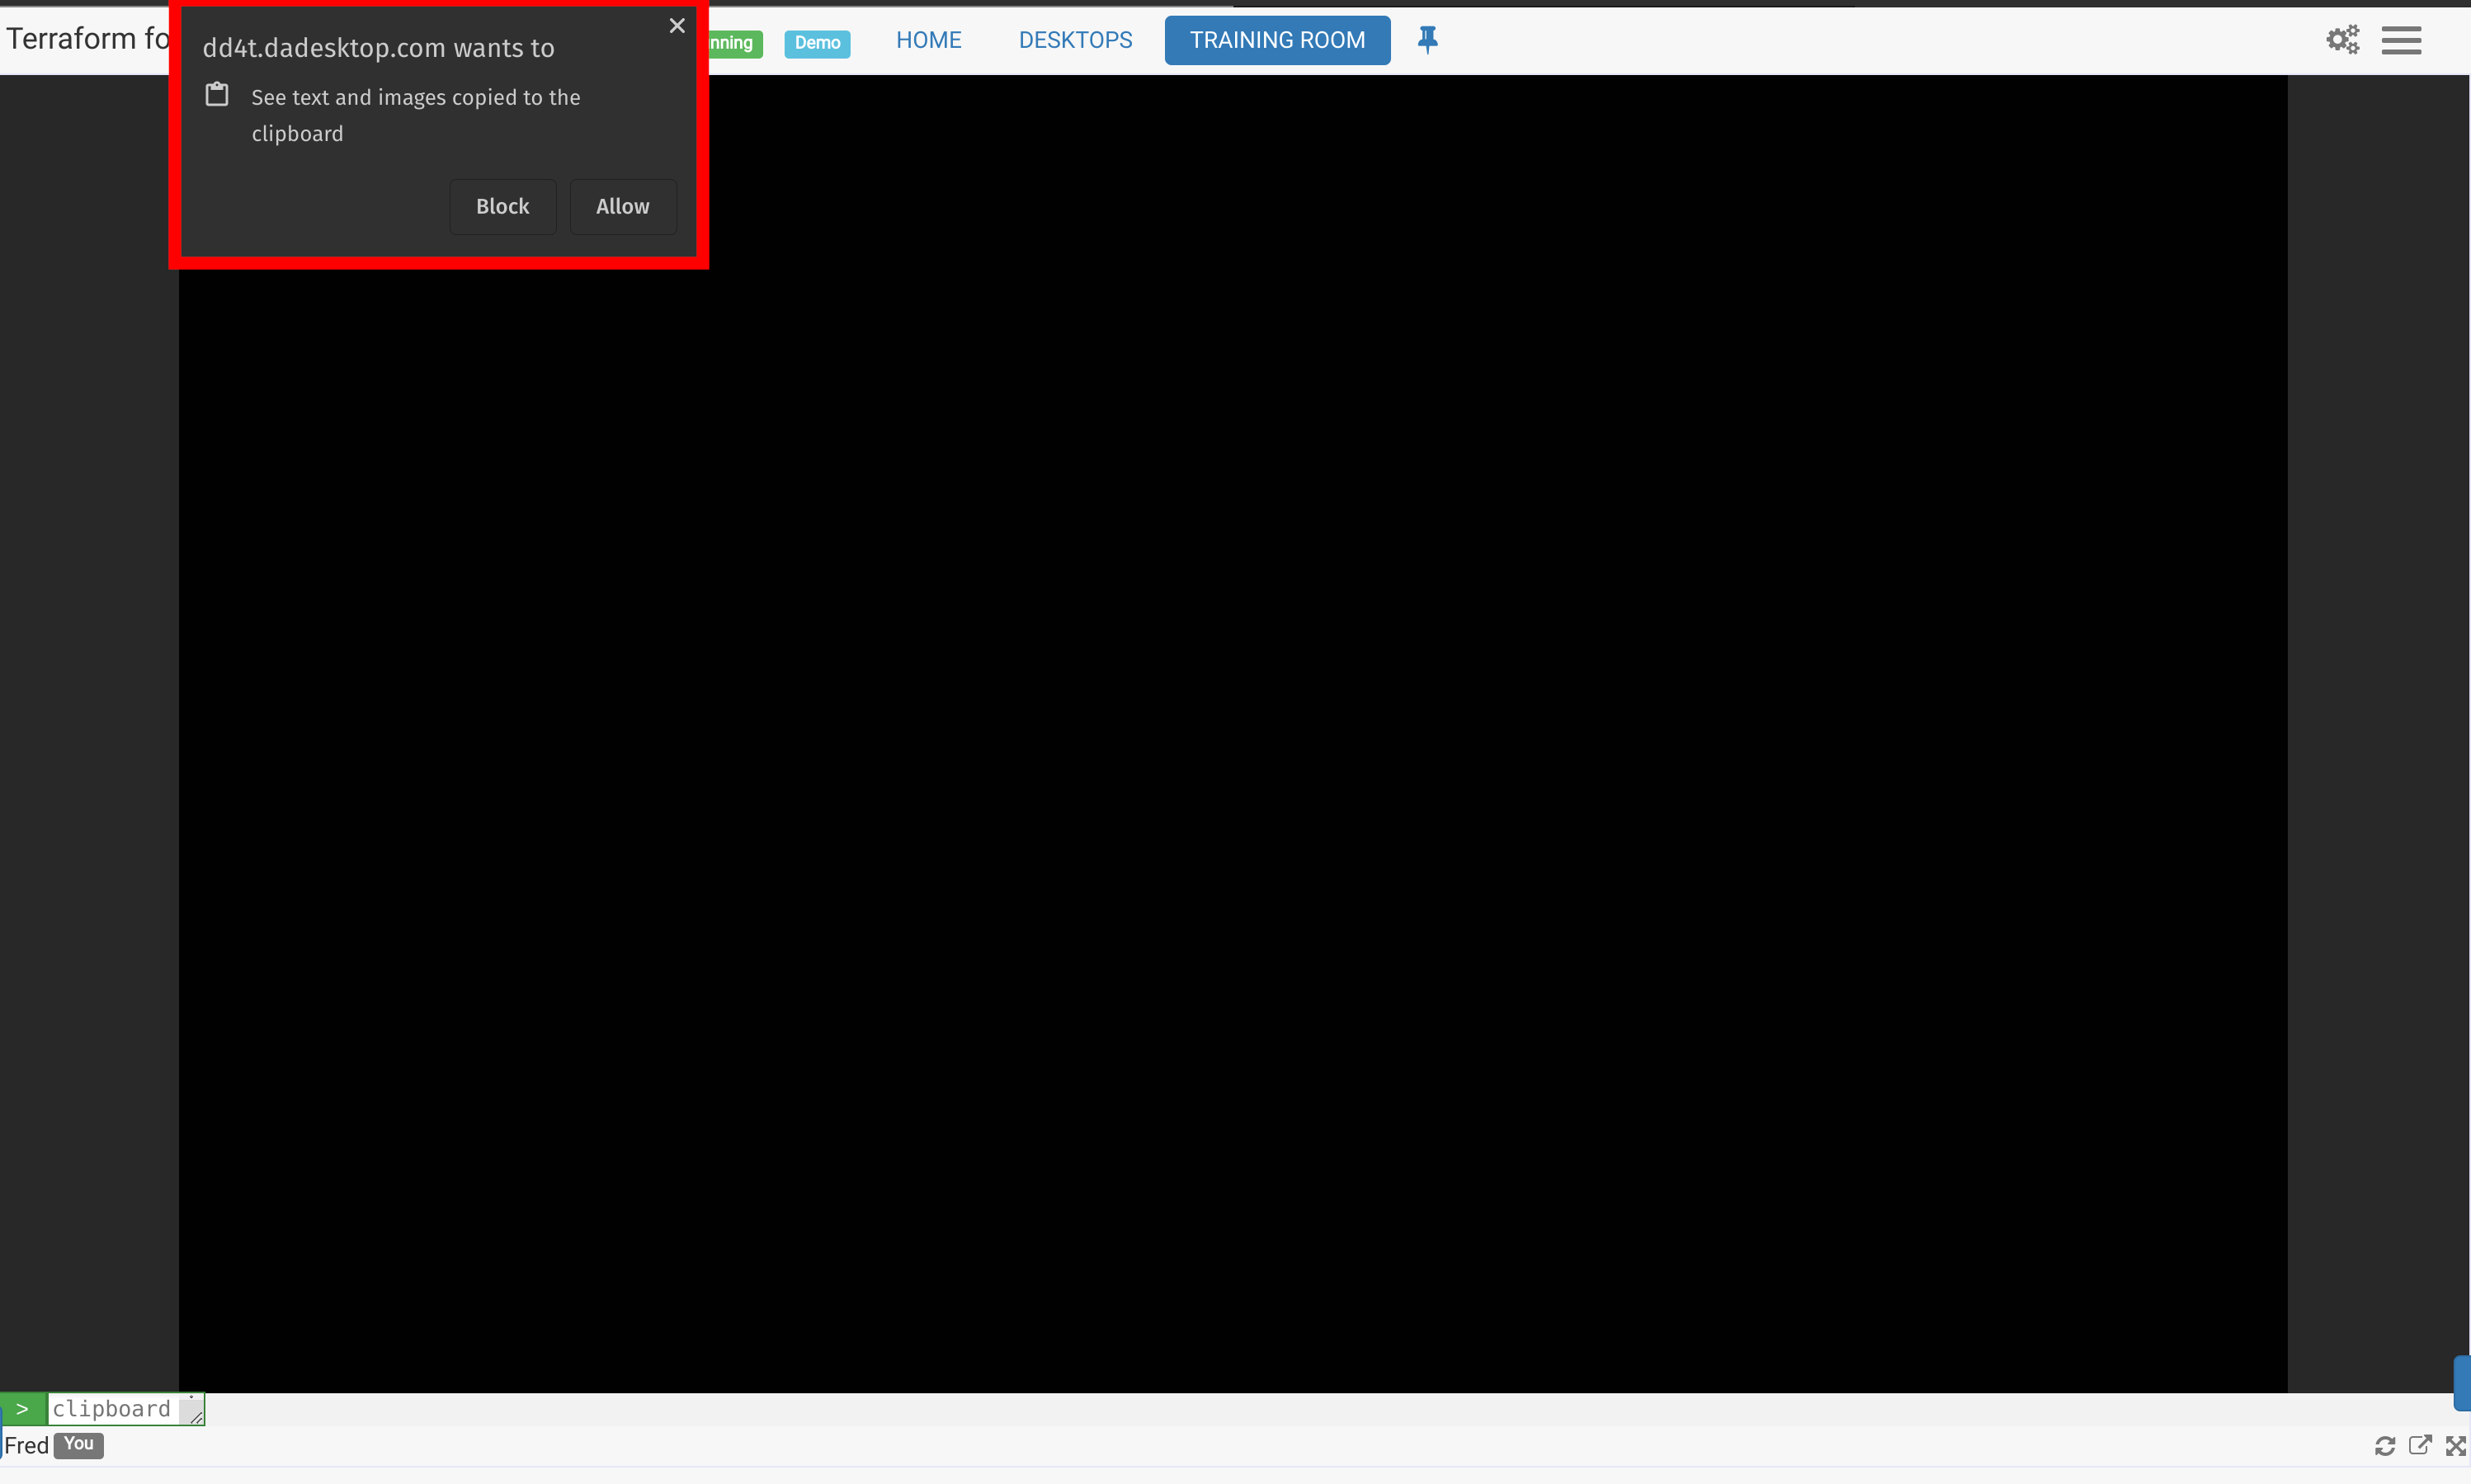
Image 04
Navigating the Training Room as a Participant
The Training Room displays a tab at the top of the screen containing links back to the course.
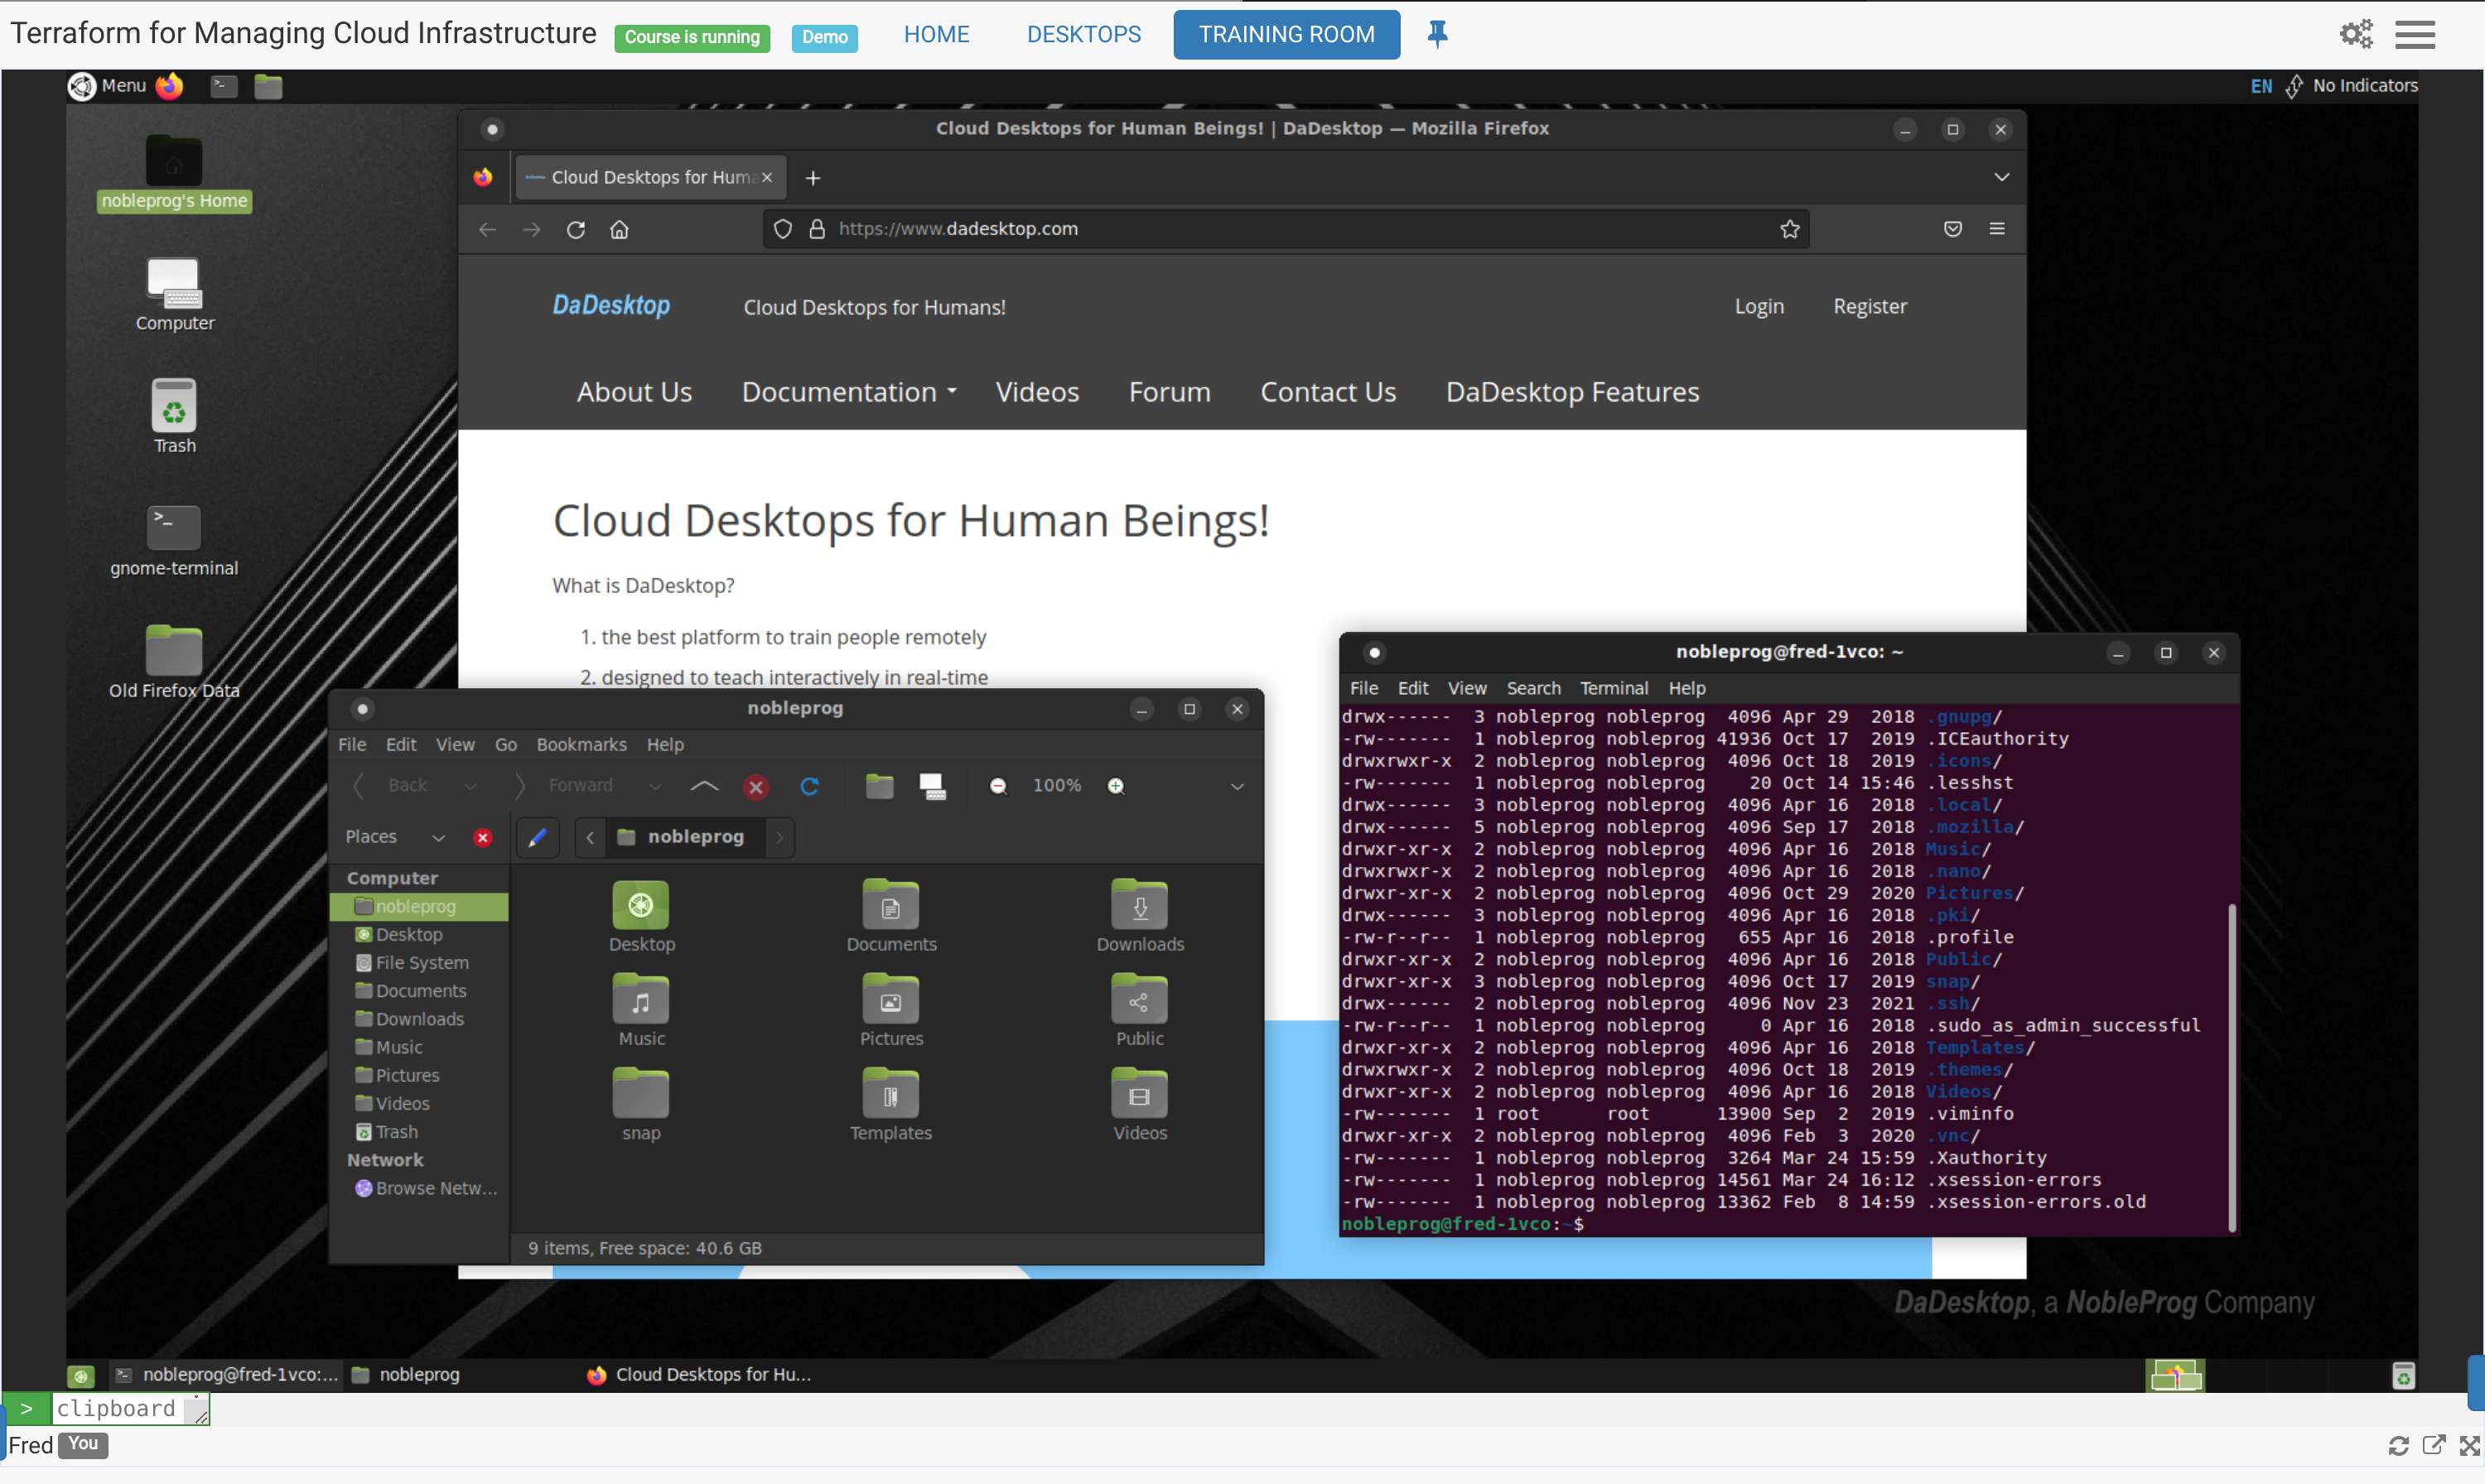
Image 05
Controls available at bottom of the screen
- From here, you can 'pop out' the screen to a second monitor if needed, and you can also maximize the browser window to full screen.
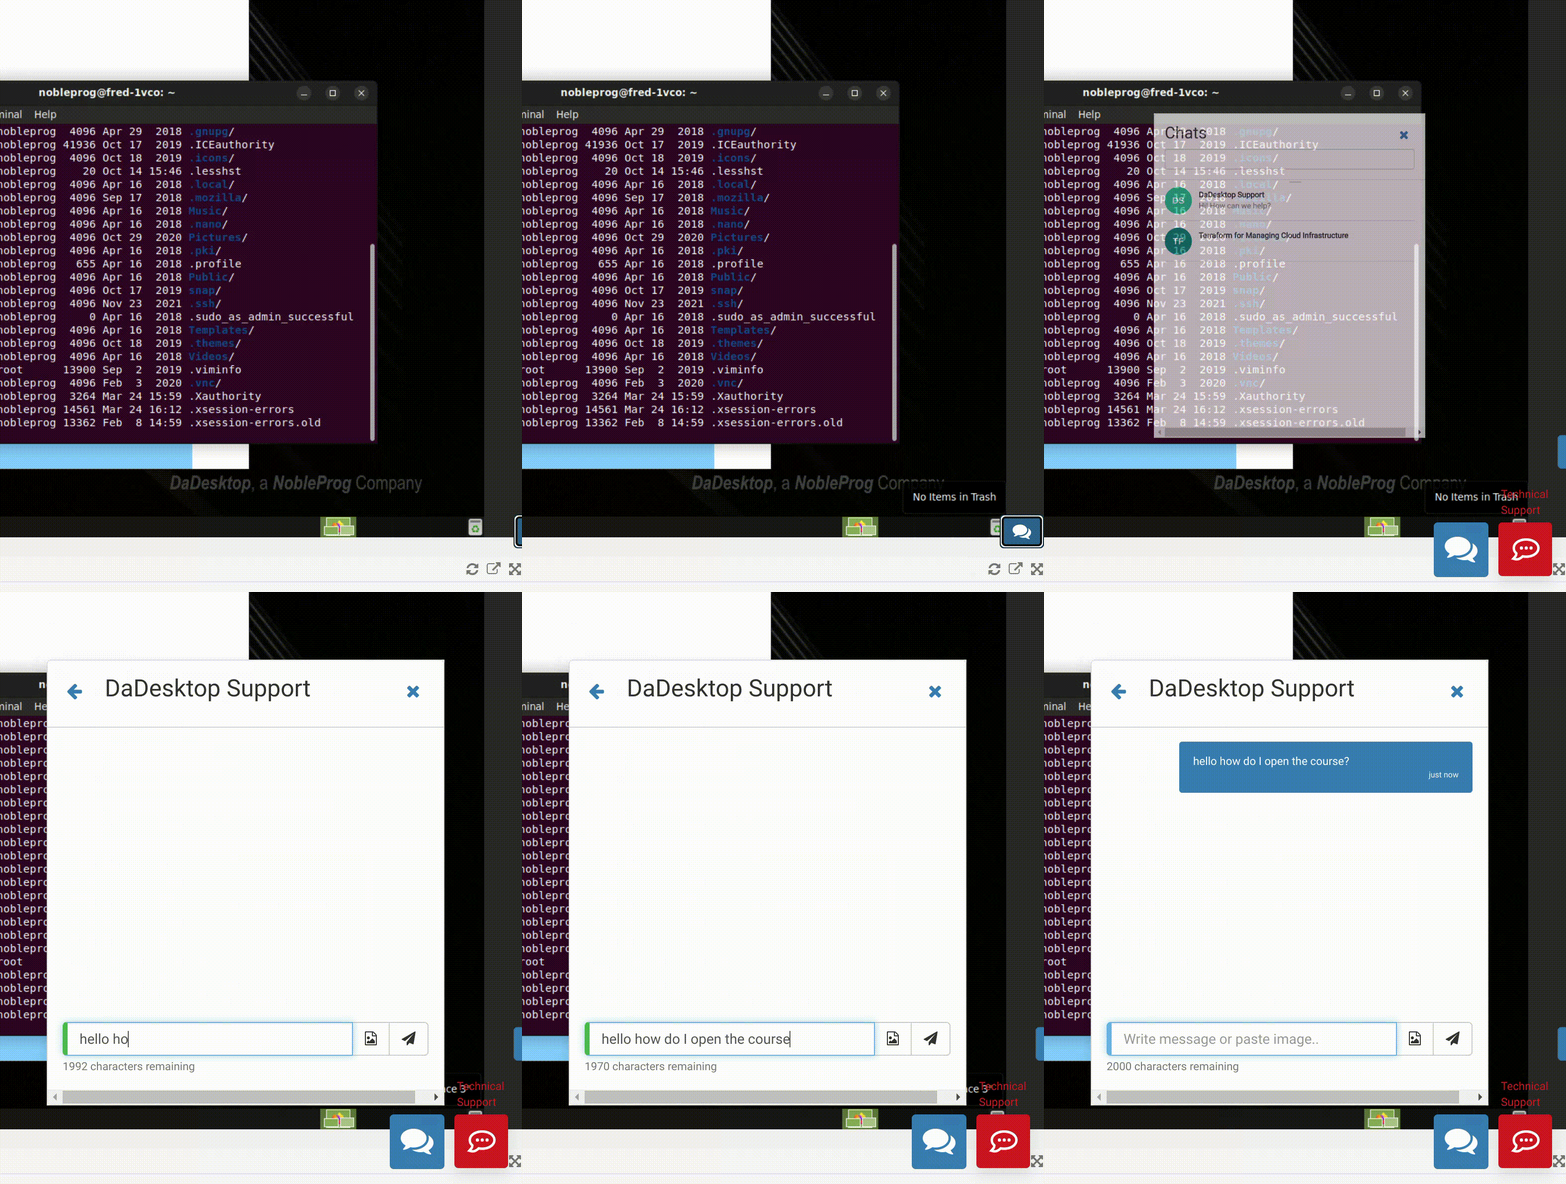
- Also, in the bottom right of the screen, a small blue toggle appears that lets you open the DaDesktop support chat.
Using the new Clipboard function
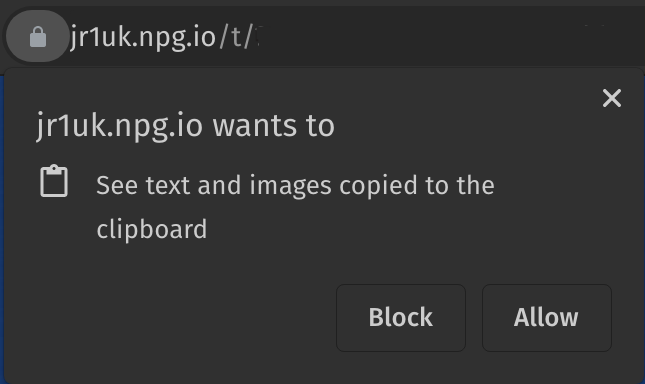 To transfer text—like web links, code snippets, etc.—from your own computer to the virtual machine, we rely on the 'Clipboard'.
When you connect to your online course or standalone desktop, a pop‑up similar to the one shown here will appear. Click ‘Allow’. Please note: images cannot be copied via the clipboard in DaDesktop at this time.
Image 06
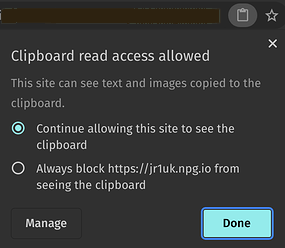 Clicking the small clipboard icon in the address bar lets you adjust the clipboard settings for that site.
Usage
- On Windows and Linux virtual desktops, use the standard keyboard shortcuts (Ctrl+C and Ctrl+V) to copy and paste.
- On a Mac, copy normally and then press Shift+Ctrl+V, or use the middle mouse button, to paste.
Image 07
If you need further help with this feature, please get in touch with us.
Original Clipboard (Use Only for Browsers Incompatible with the New Clipboard, e.g., IE, or as a Fallback)
- To transfer text between your computer and the virtual DaDesktop machine, type or paste it into the clipboard area at the bottom left of the screen.
-
Inside the virtual machine, press the middle mouse button (or scroll wheel) to paste the clipboard content onto the desktop. This works anywhere in DaDesktop where text input is allowed. Note: this applies when using the standard Linux DaDesktop virtual machine.
Mac users – use Command+C (⌘C) to copy and Command+V (⌘V) to paste. Once inside the dd4t clipboard, the shortcuts switch to Control+X, C, and V for cut, copy, and paste. - When using the Windows virtual machine, right‑click to paste from the clipboard.
To adjust the size of the clipboard area, click the green‑and‑white arrow icon at the bottom left of the screen.
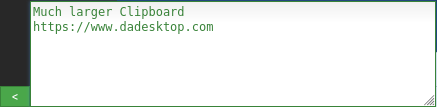

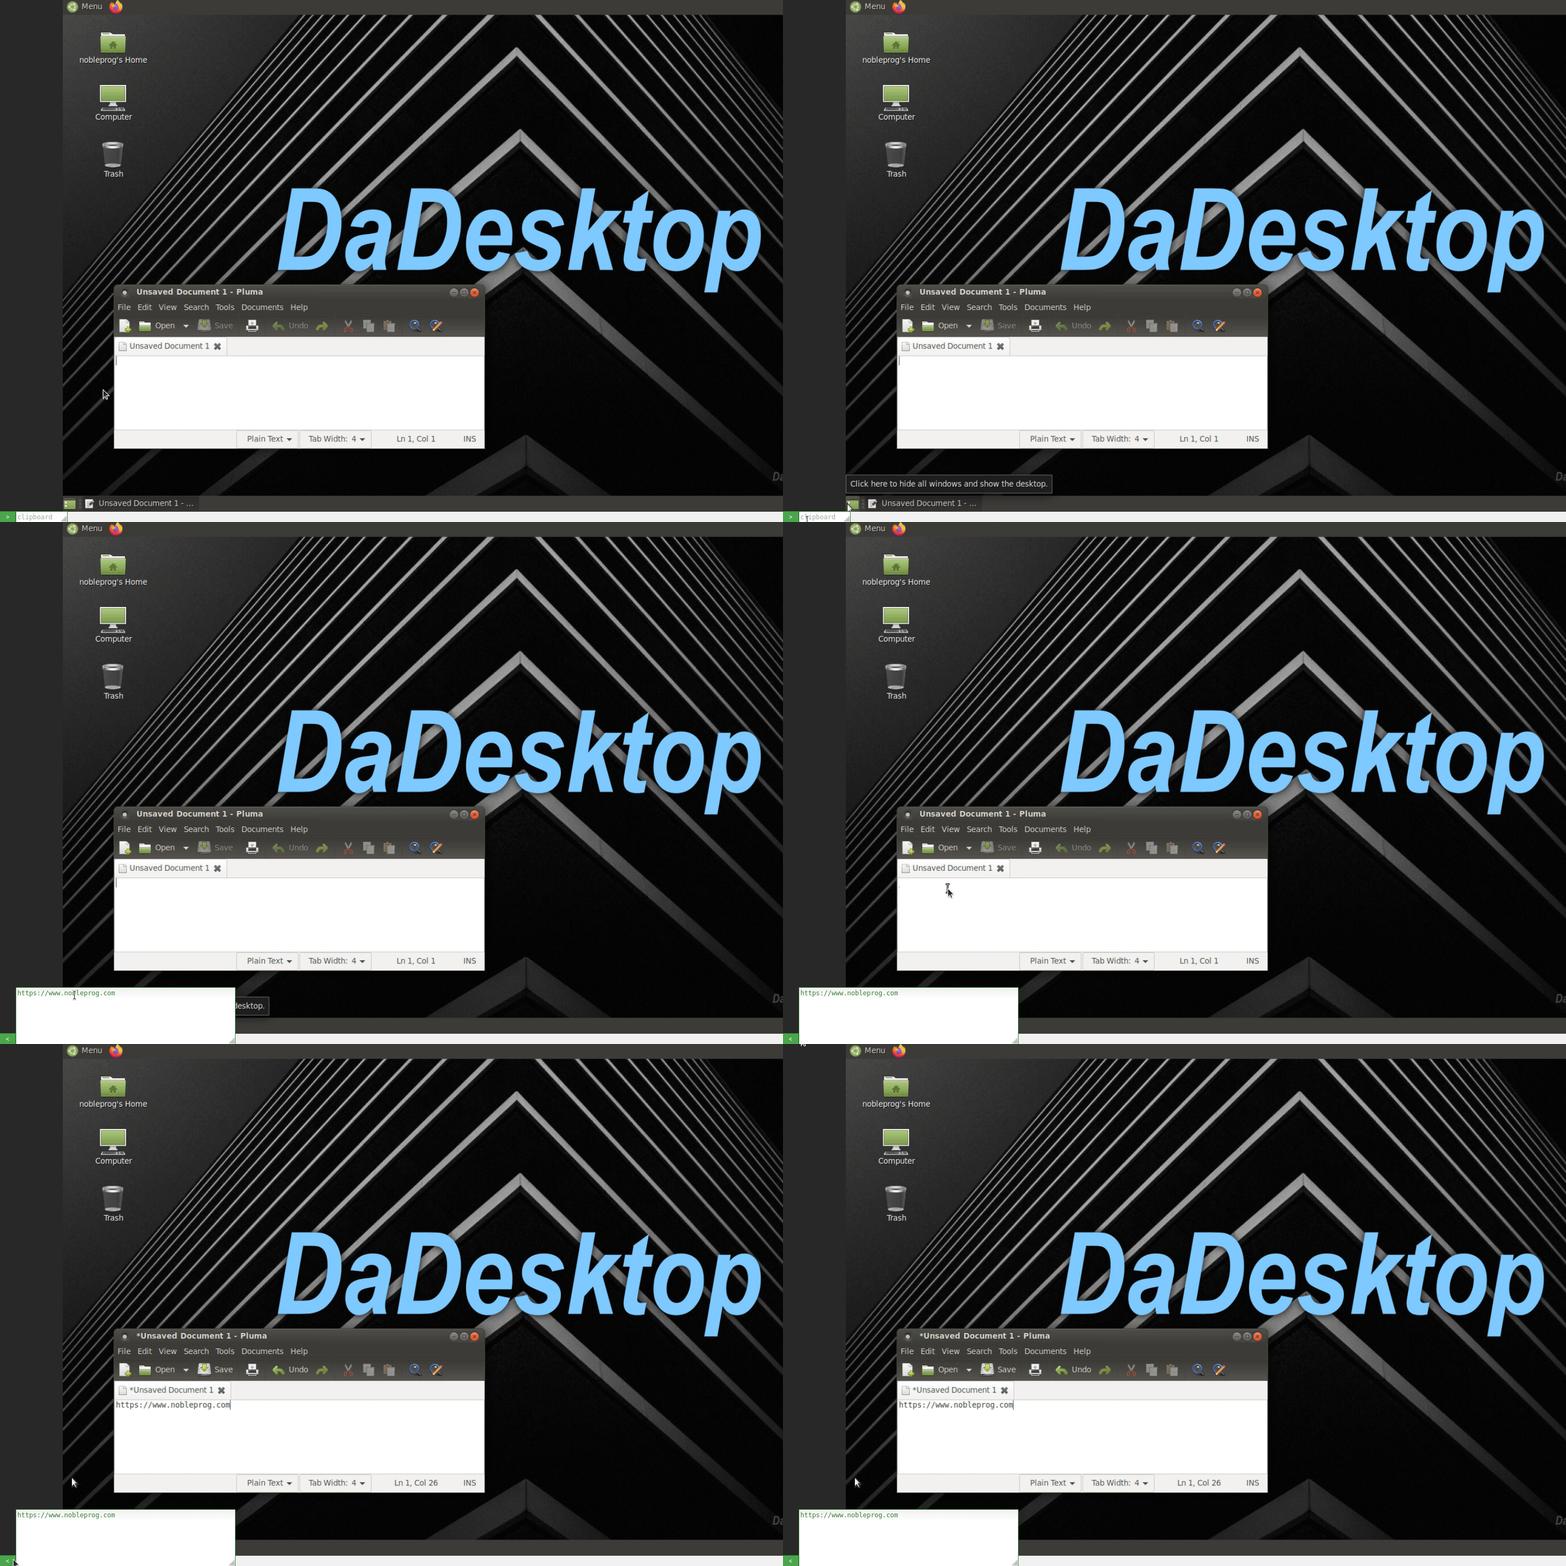
Image 08
Using the mouse in a multi‑user scenario
This feature shows the username of whoever is controlling the mouse right next to the cursor whenever more than one person is connected to the same desktop. It’s particularly helpful in multi‑user settings and during training when control of the mouse passes between different participants.
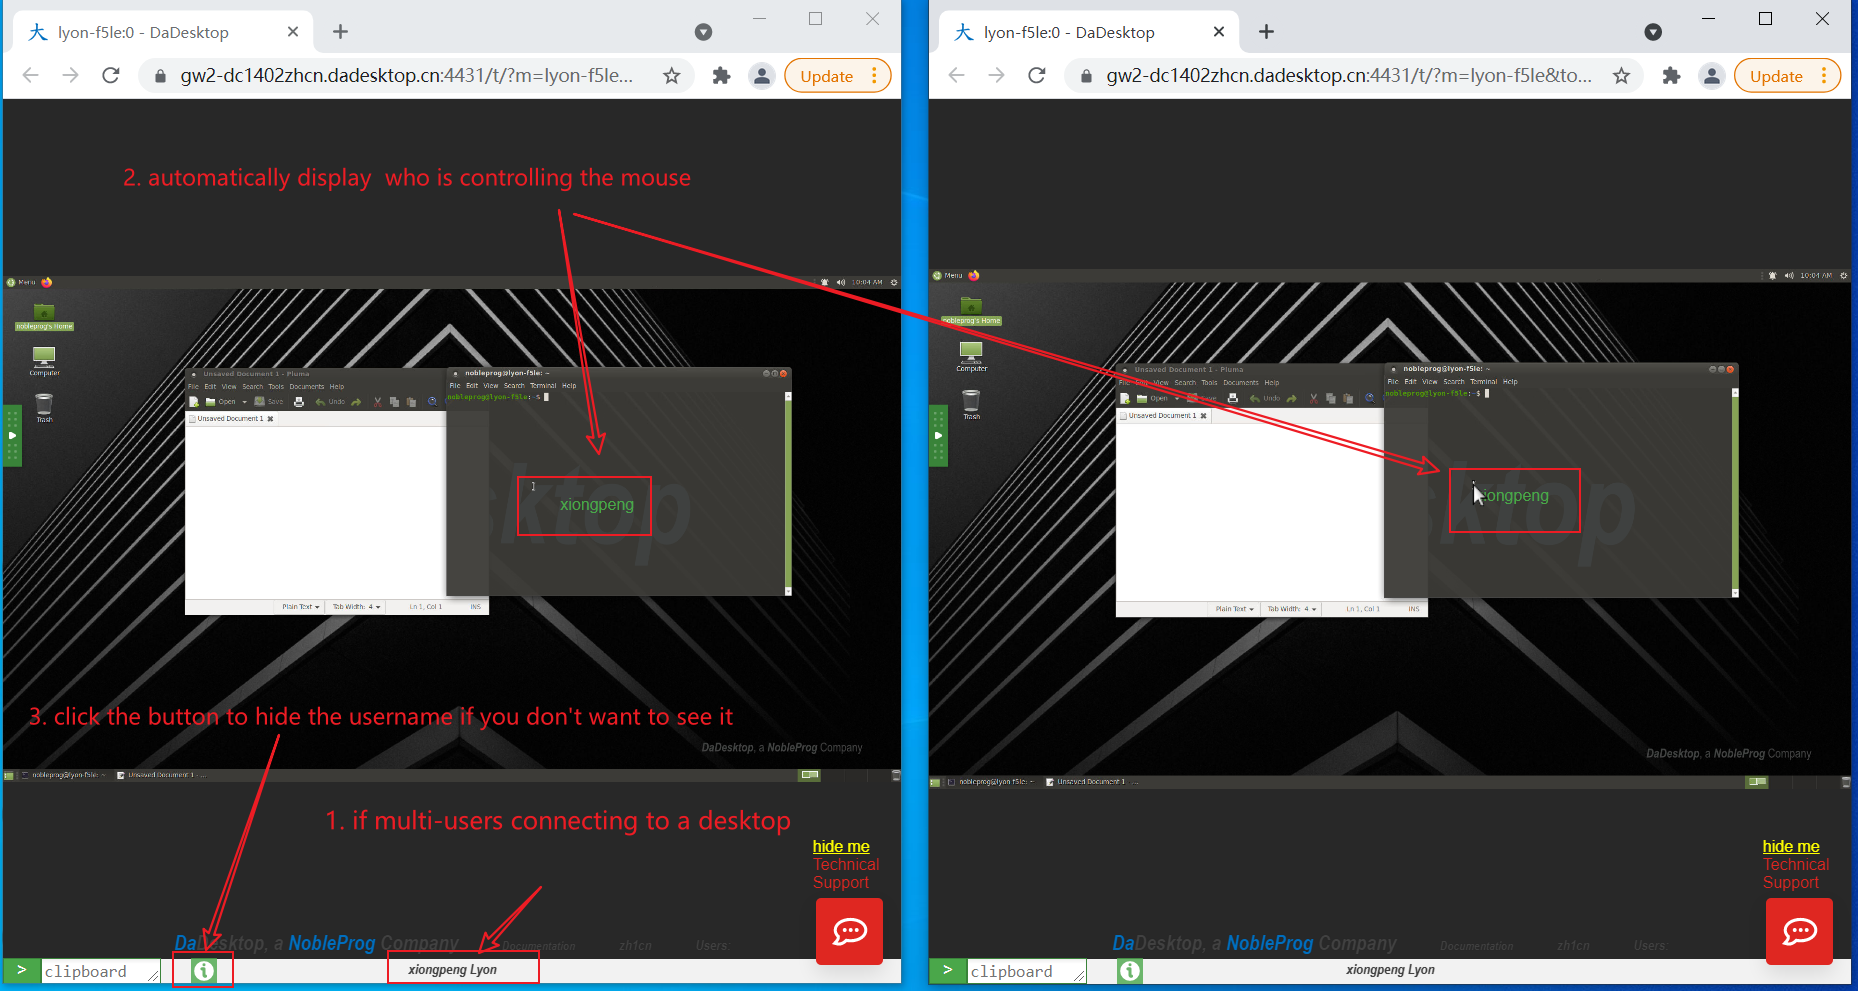
Image 09
When multiple users are connected to the desktop, their names appear in the centre bottom area of the screen.
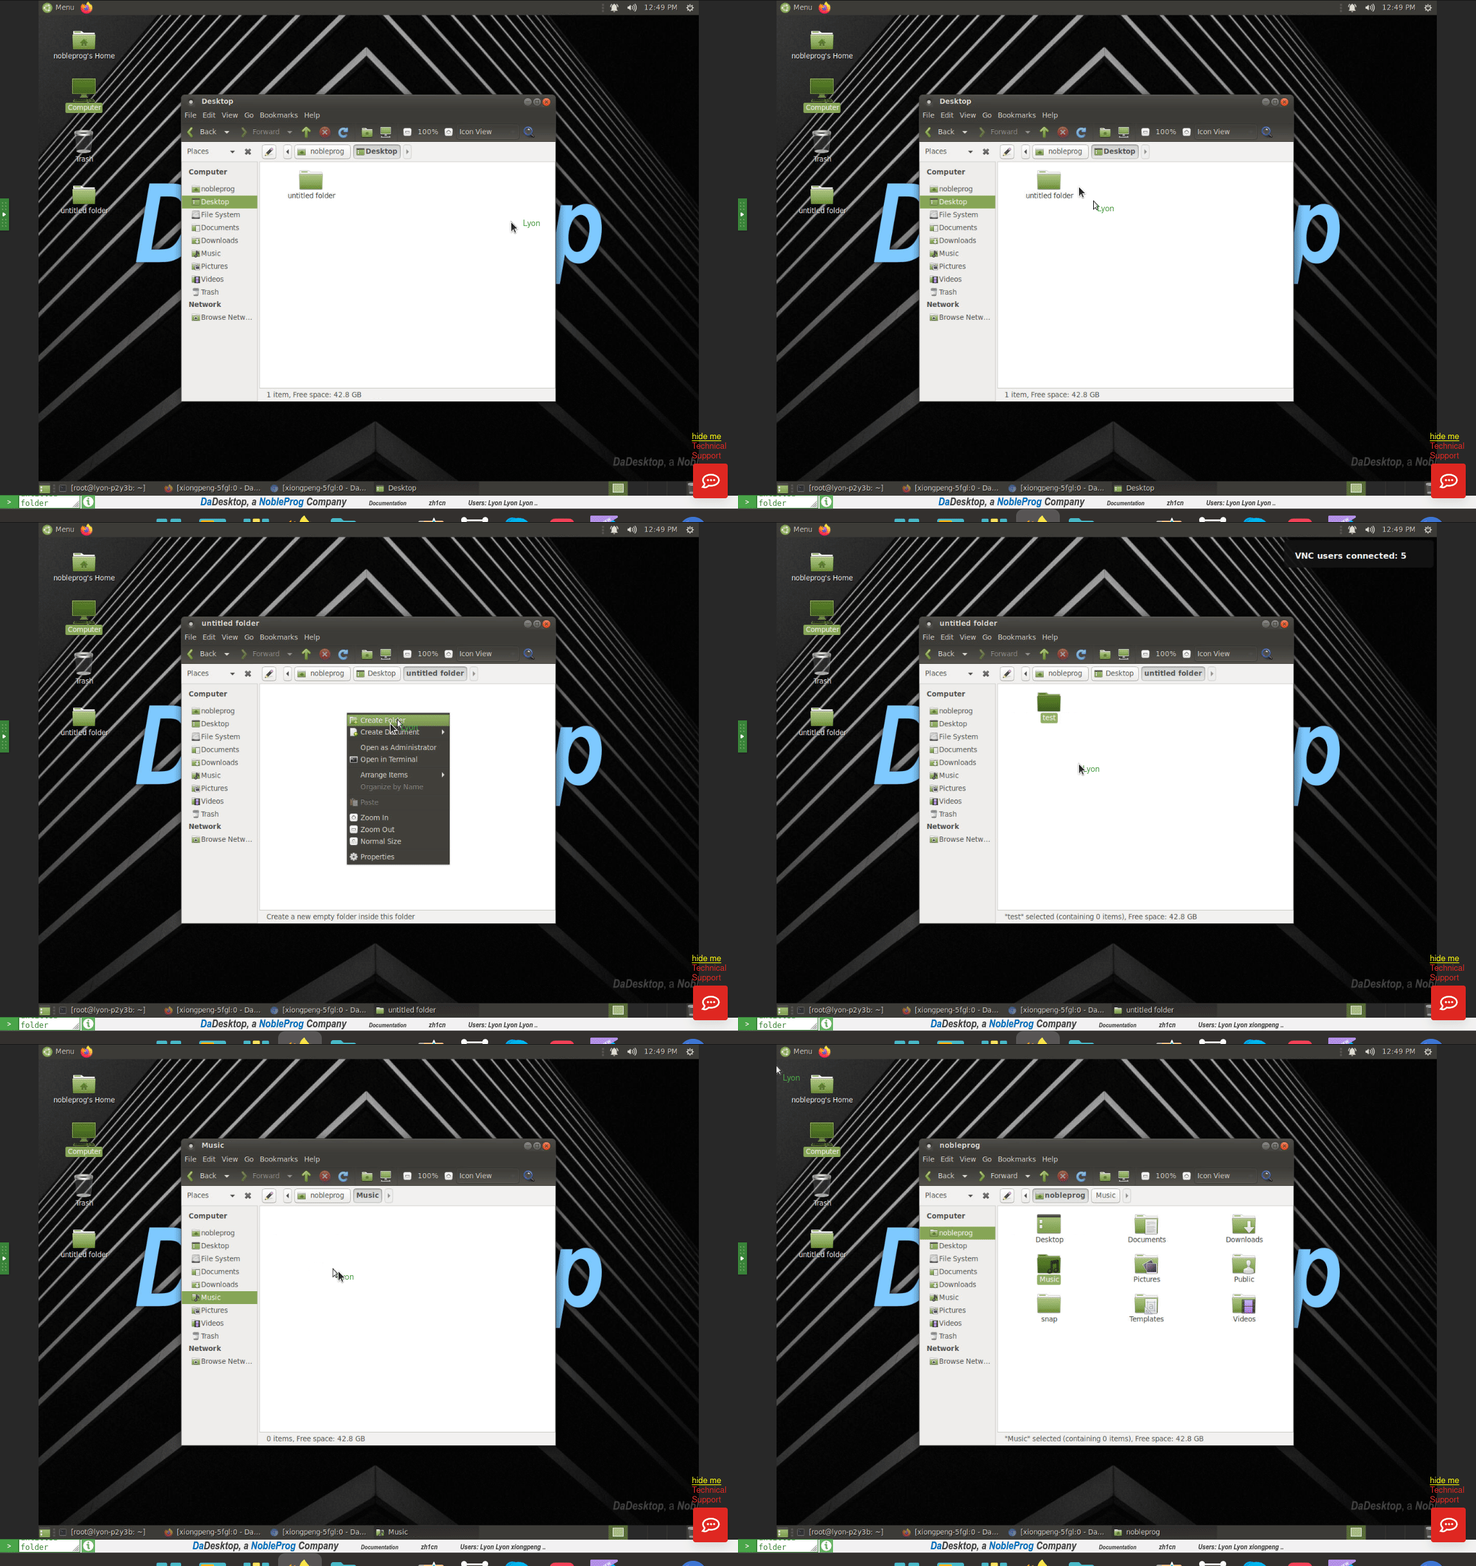
Image 10
You can turn this feature on or off by clicking the ‘Info’ button in green at the bottom of the screen.