DaDesktop 参与者指南 - 如何操作
目标
本指南面向希望加入 DaDesktop 上托管的课程的 参与者(学生)。
DaDesktop 概述
DaDesktop 是一个专为 IT 培训设计的云平台,面向 IT 讲师和学习者,采用革命性的 DaDesktop® 技术提供虚拟桌面。通过这些会话,每位参与者都拥有自己的完整在线桌面,可以在培训师的监督下进行练习。
它由三个主要部分组成:
- 管理控制台 —— 一个用于系统管理的 Web UI,例如启动和停止云桌面等。
- 培训室 —— 一个用于远程桌面共享、音频、聊天、课程录制等的共享空间。
-
远程桌面 —— 一台虚拟机(Windows 或 Linux);每个用户一台。
要求
如果您想在中国的办公室或家中加入课程,您需要:
- 具有可靠互联网连接的计算机(PC 或笔记本电脑),最低下载速度 10Mbit/s,上传速度 1Mbit/s。支持 Windows/Mac 或 Linux 机型。
- Chrome 或 Firefox 网页浏览器
- 优质的麦克风或头戴式耳麦(电话是最后的手段,但不推荐)
-
一个安静、不受外界干扰和噪音的地方(咖啡馆不行)
推荐事项:
- 网络摄像头
- 第二台显示器;使用一台显示器跟随培训师,另一台屏幕用于实验室中使用您的 DaDesktop 虚拟机。
- 加入课程前关闭所有 VPN
- 如有可能,禁用可能与网络连接冲突的任何安全应用程序
- 如果可能,使用以太网连接;如果使用 Wifi,请提前测试您的互联网速度,例如 speedtest.net
您可能希望在课程开始前尝试加入您的课程并体验使用 DaDesktop 虚拟教室。如果是这样,请注意,在课程开始前的几天内,您只能访问桌面本身 15 分钟。
课程访问权限
请注意,在课程日之外,您对课程的访问权限仅限于 15 分钟。
在课程日,全天均可访问。以前仅在课程开始前一小时左右才允许访问。
课程结束后保留桌面
使用 DaDesktop 的一大优势是,课程参与者可以选择在课程结束后继续使用他们的机器。
请查看上述链接了解完整操作详情。
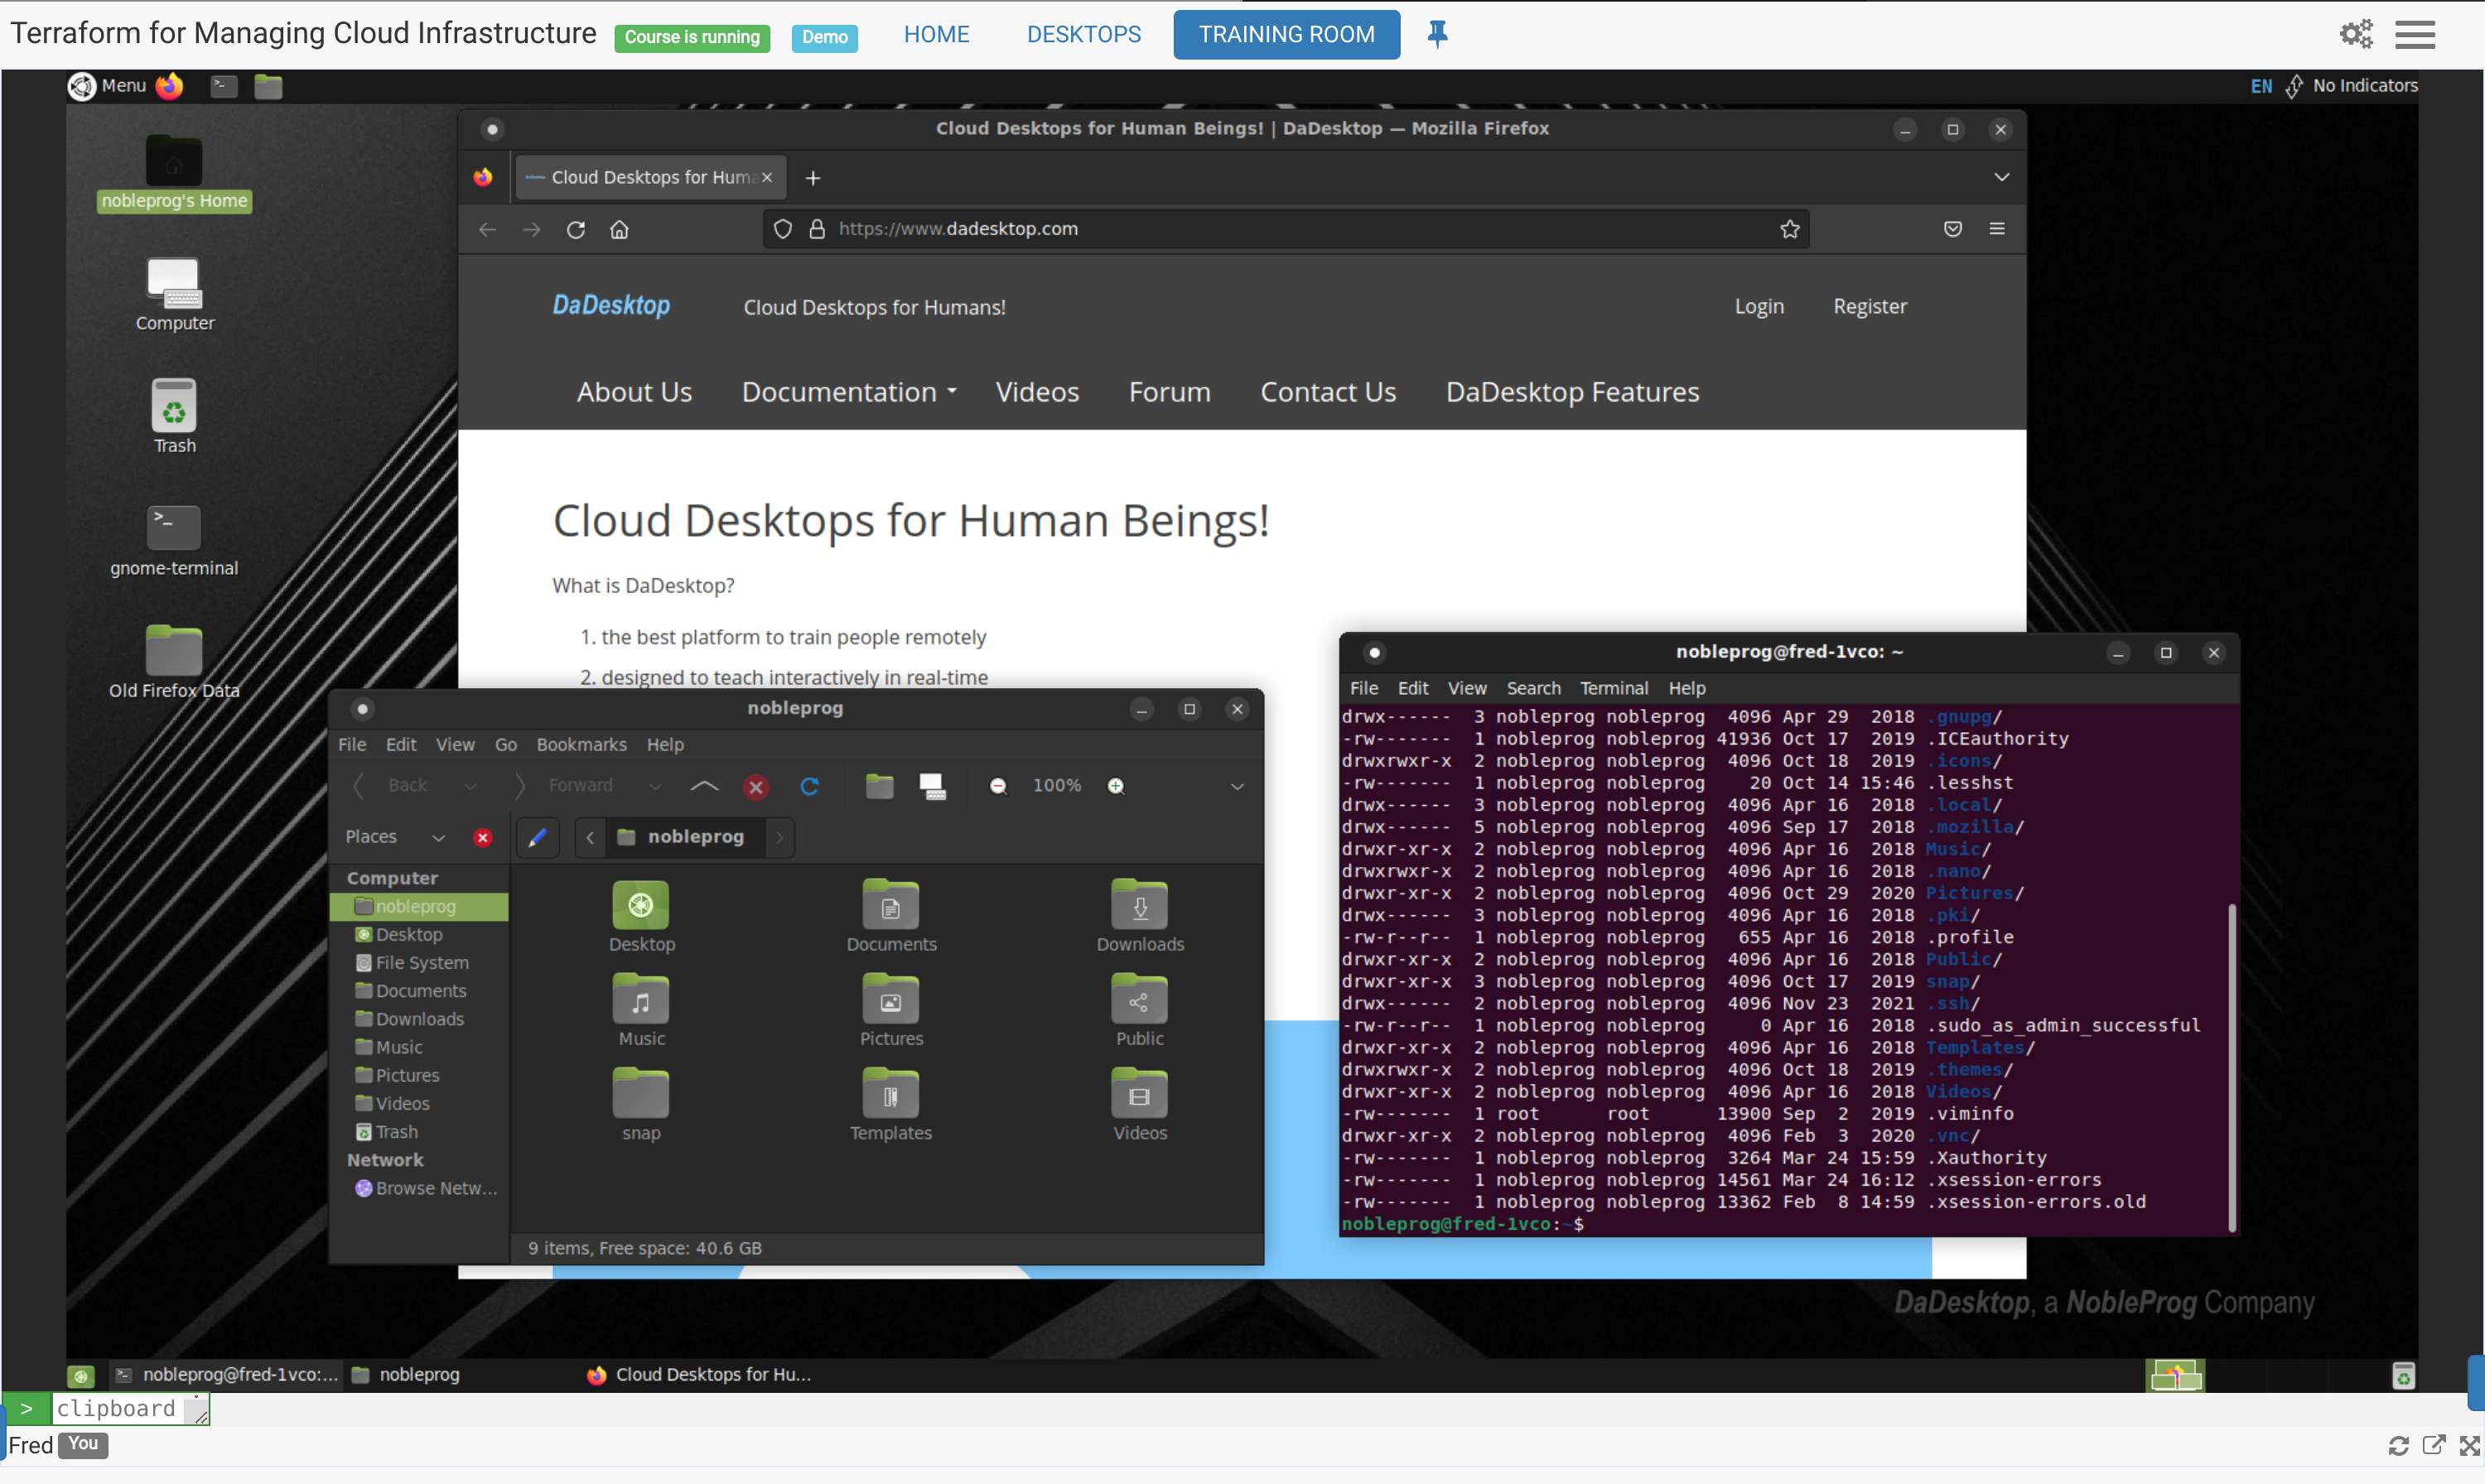
加入课程
打开协调员发送给您的链接(例如 dd4t.dadesktop.com/da/join/xxxxx)。
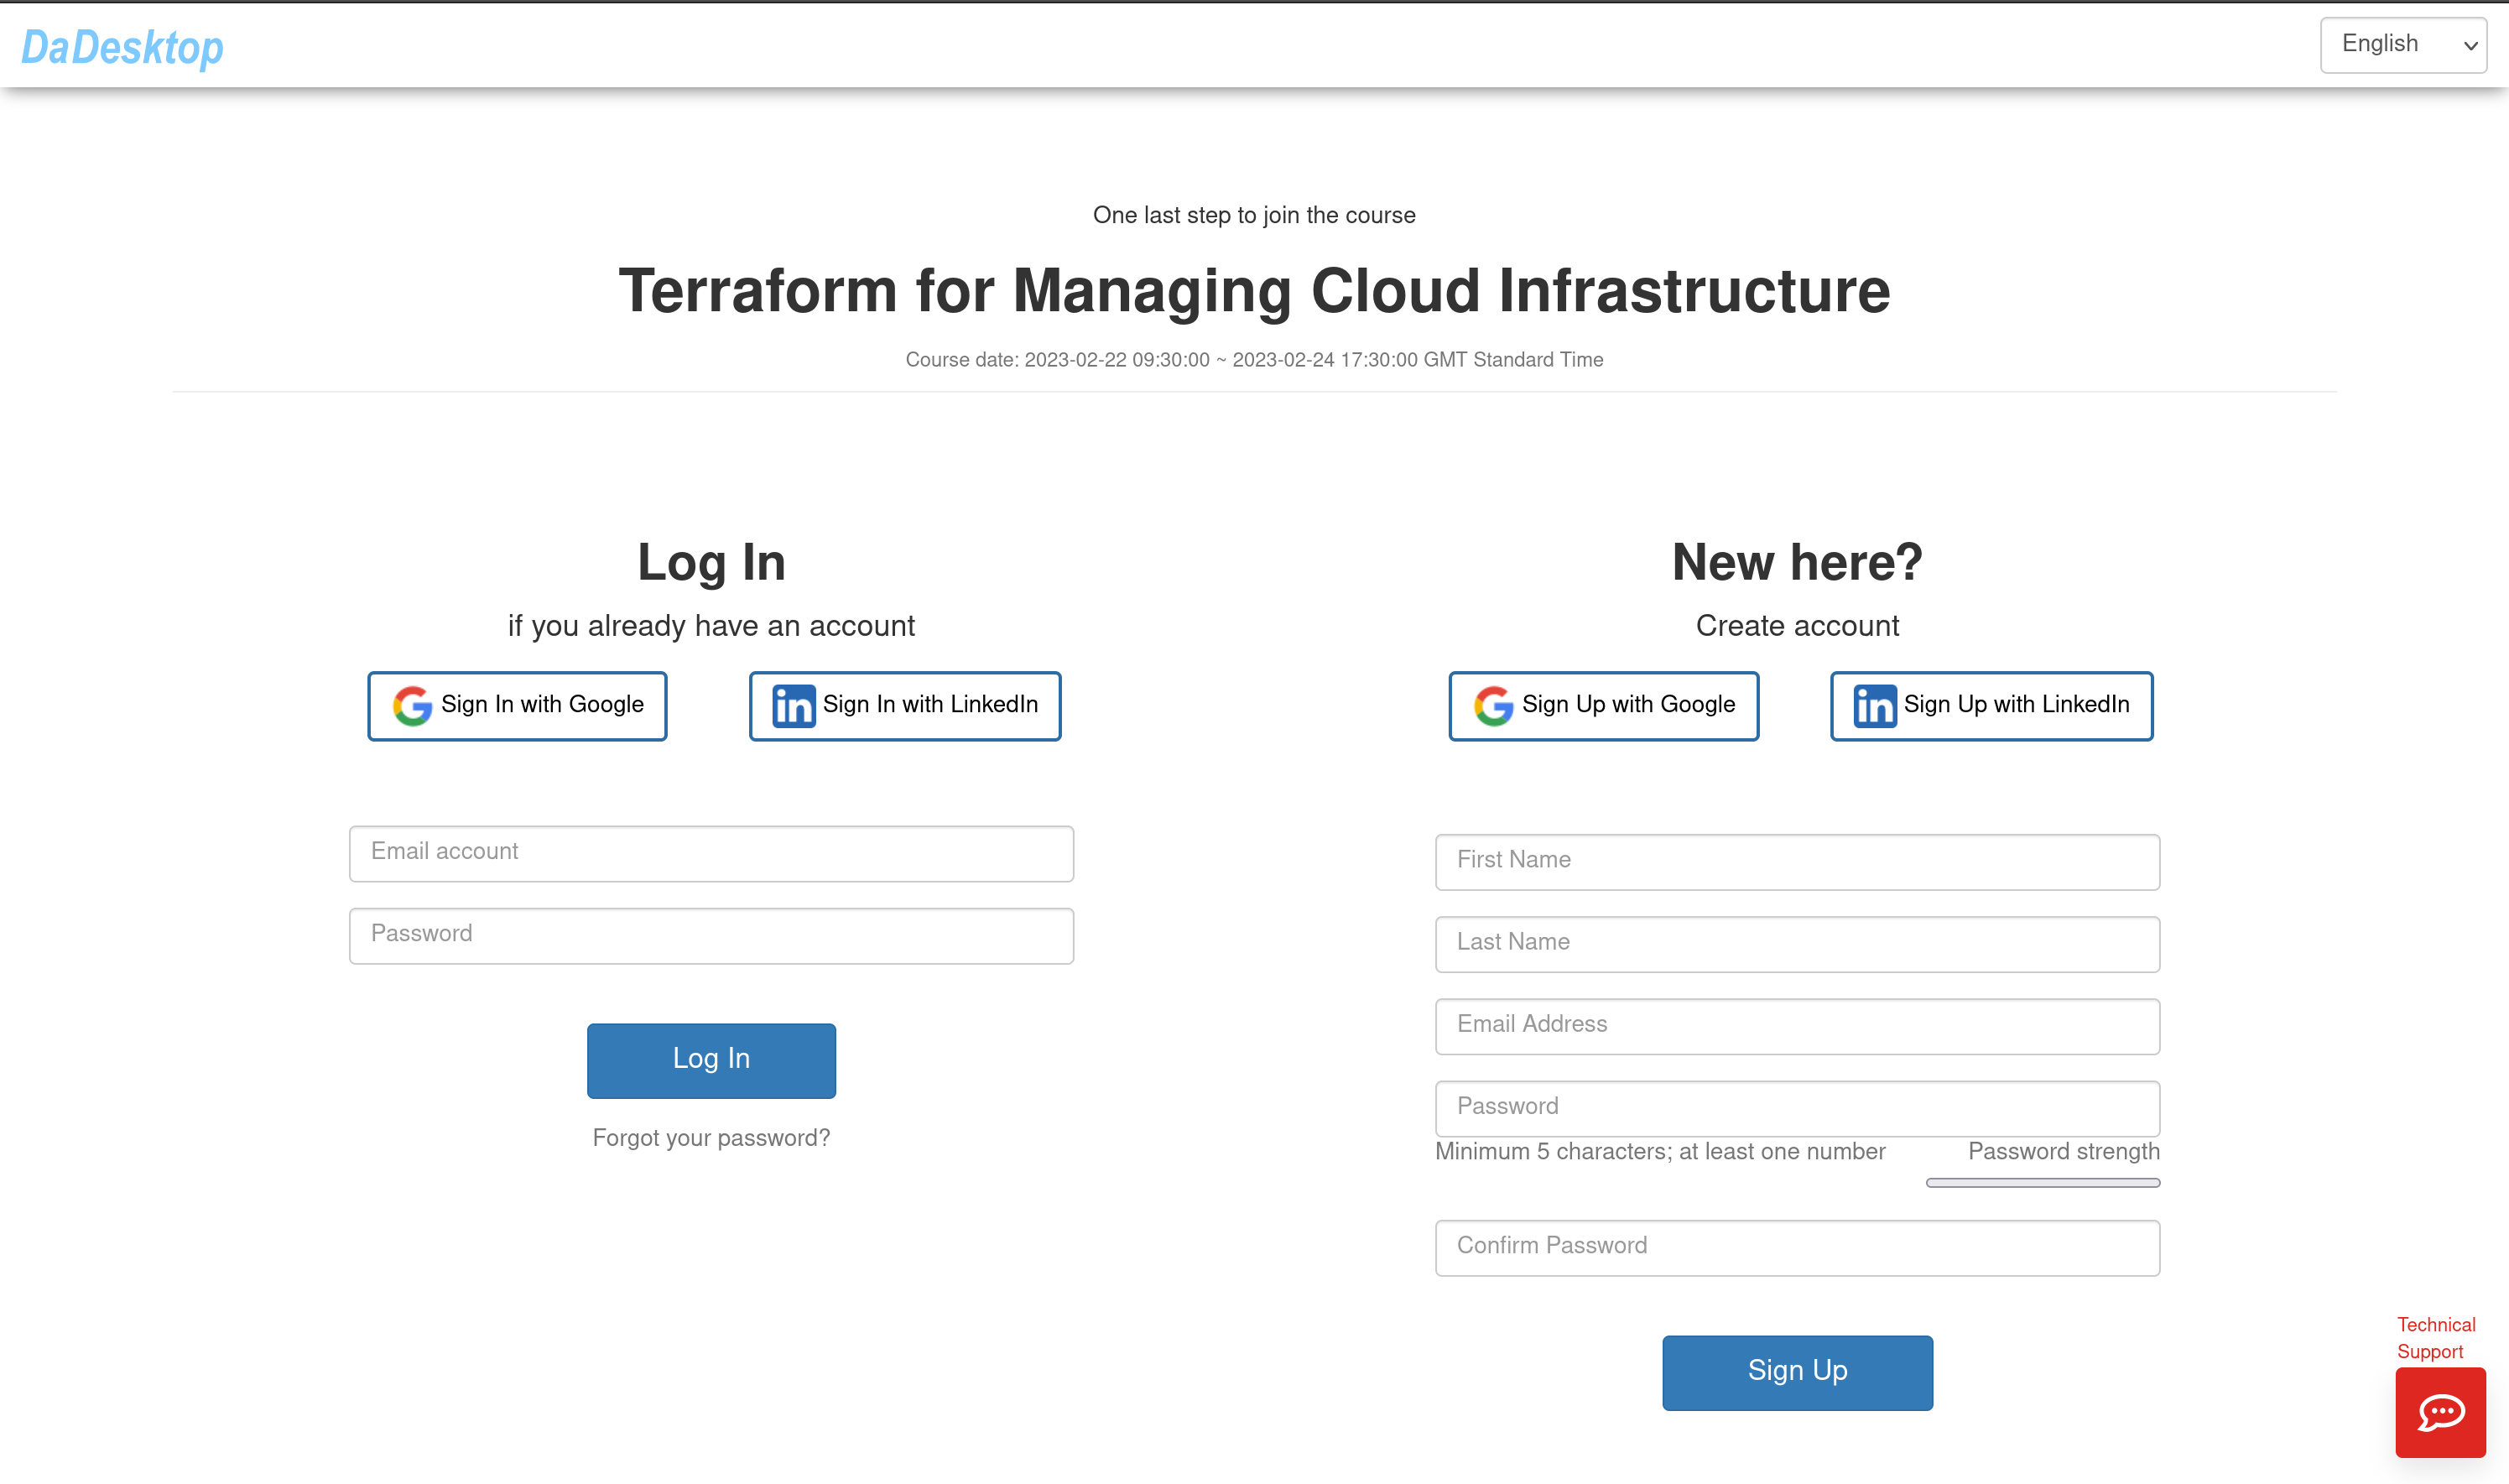
图片 01
如果您是 首次使用,请在“账户”下输入您的详细信息,然后点击“Sign Up”。您可以通过表单加入,也可以通过 Google 或 LinkedIn 账户注册加入。
如果您 已有账户,只需登录即可。
这将带您进入课程的“管理控制台”。
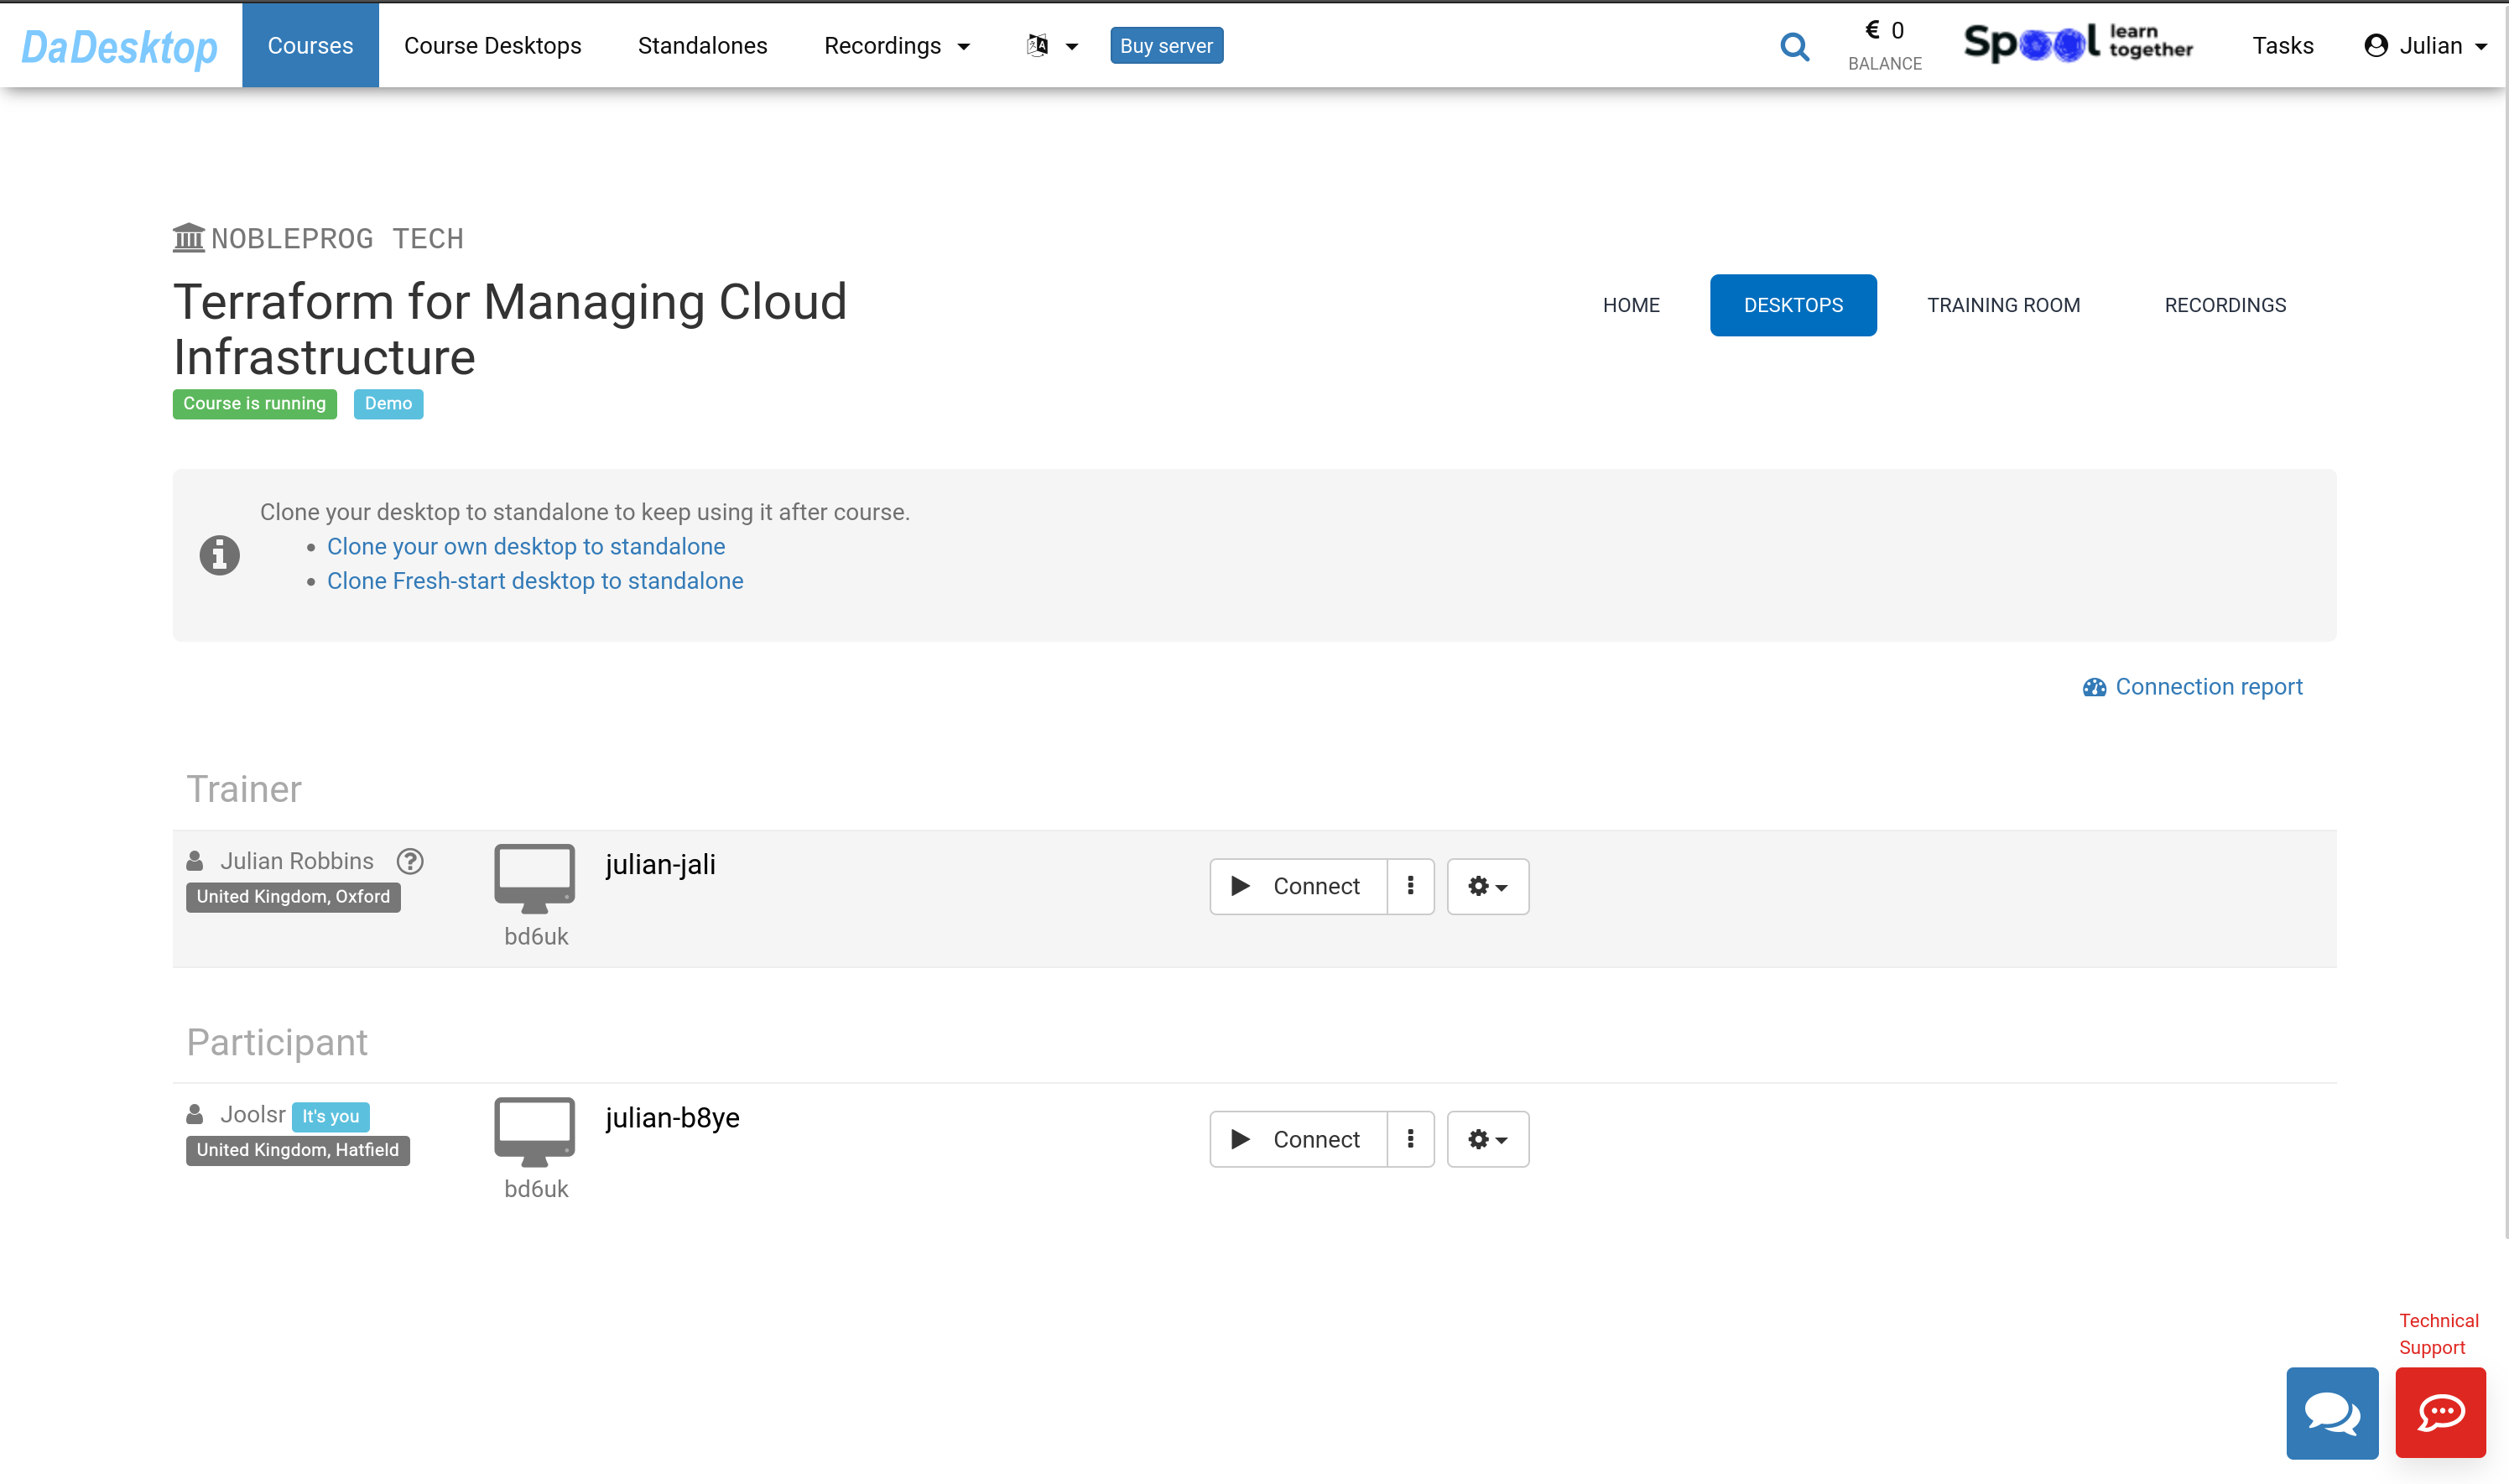
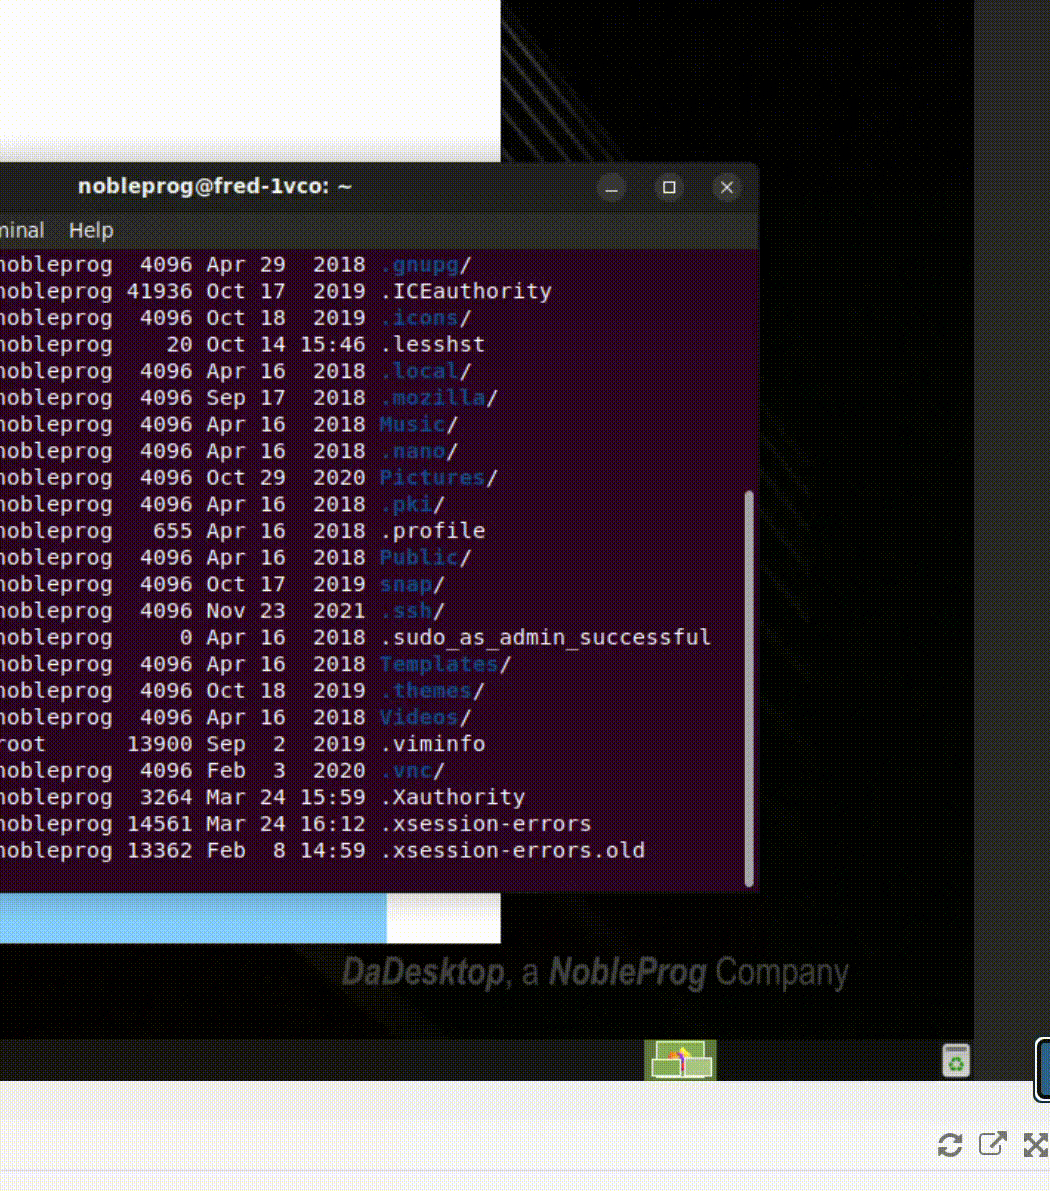
图片 02
使用管理控制台
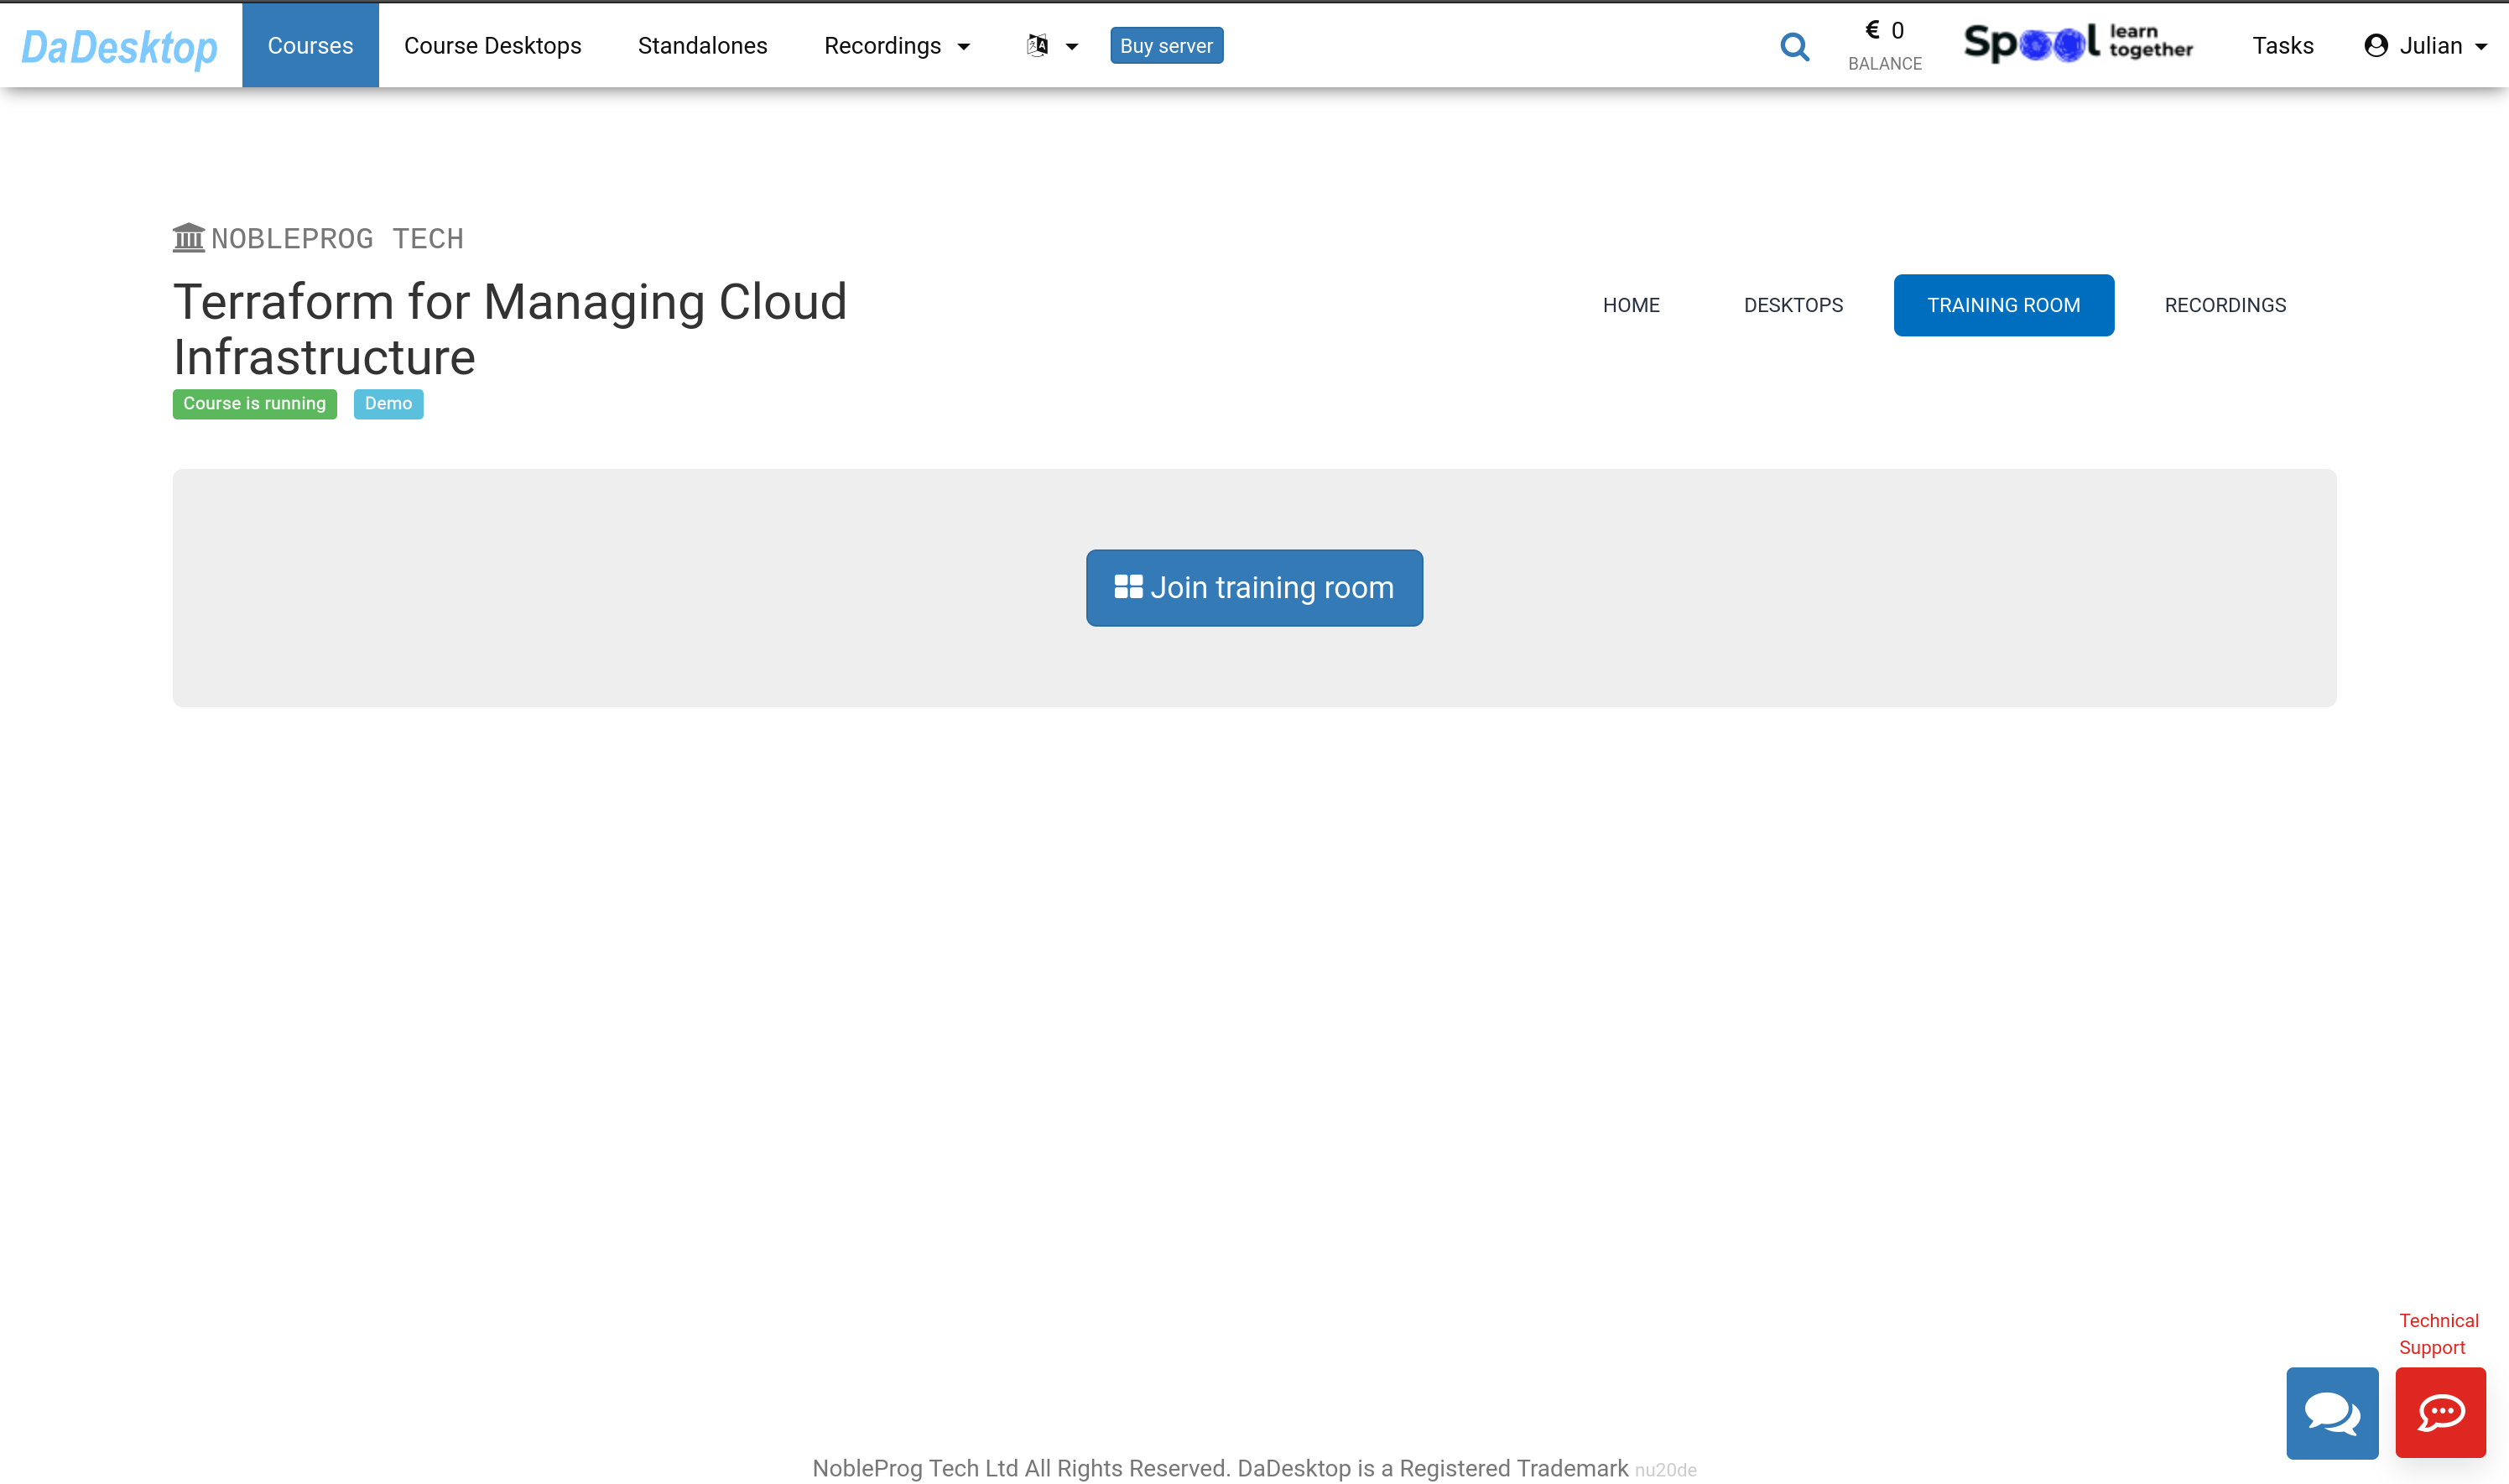
点击“培训室”选项卡。
点击“加入培训室”按钮。
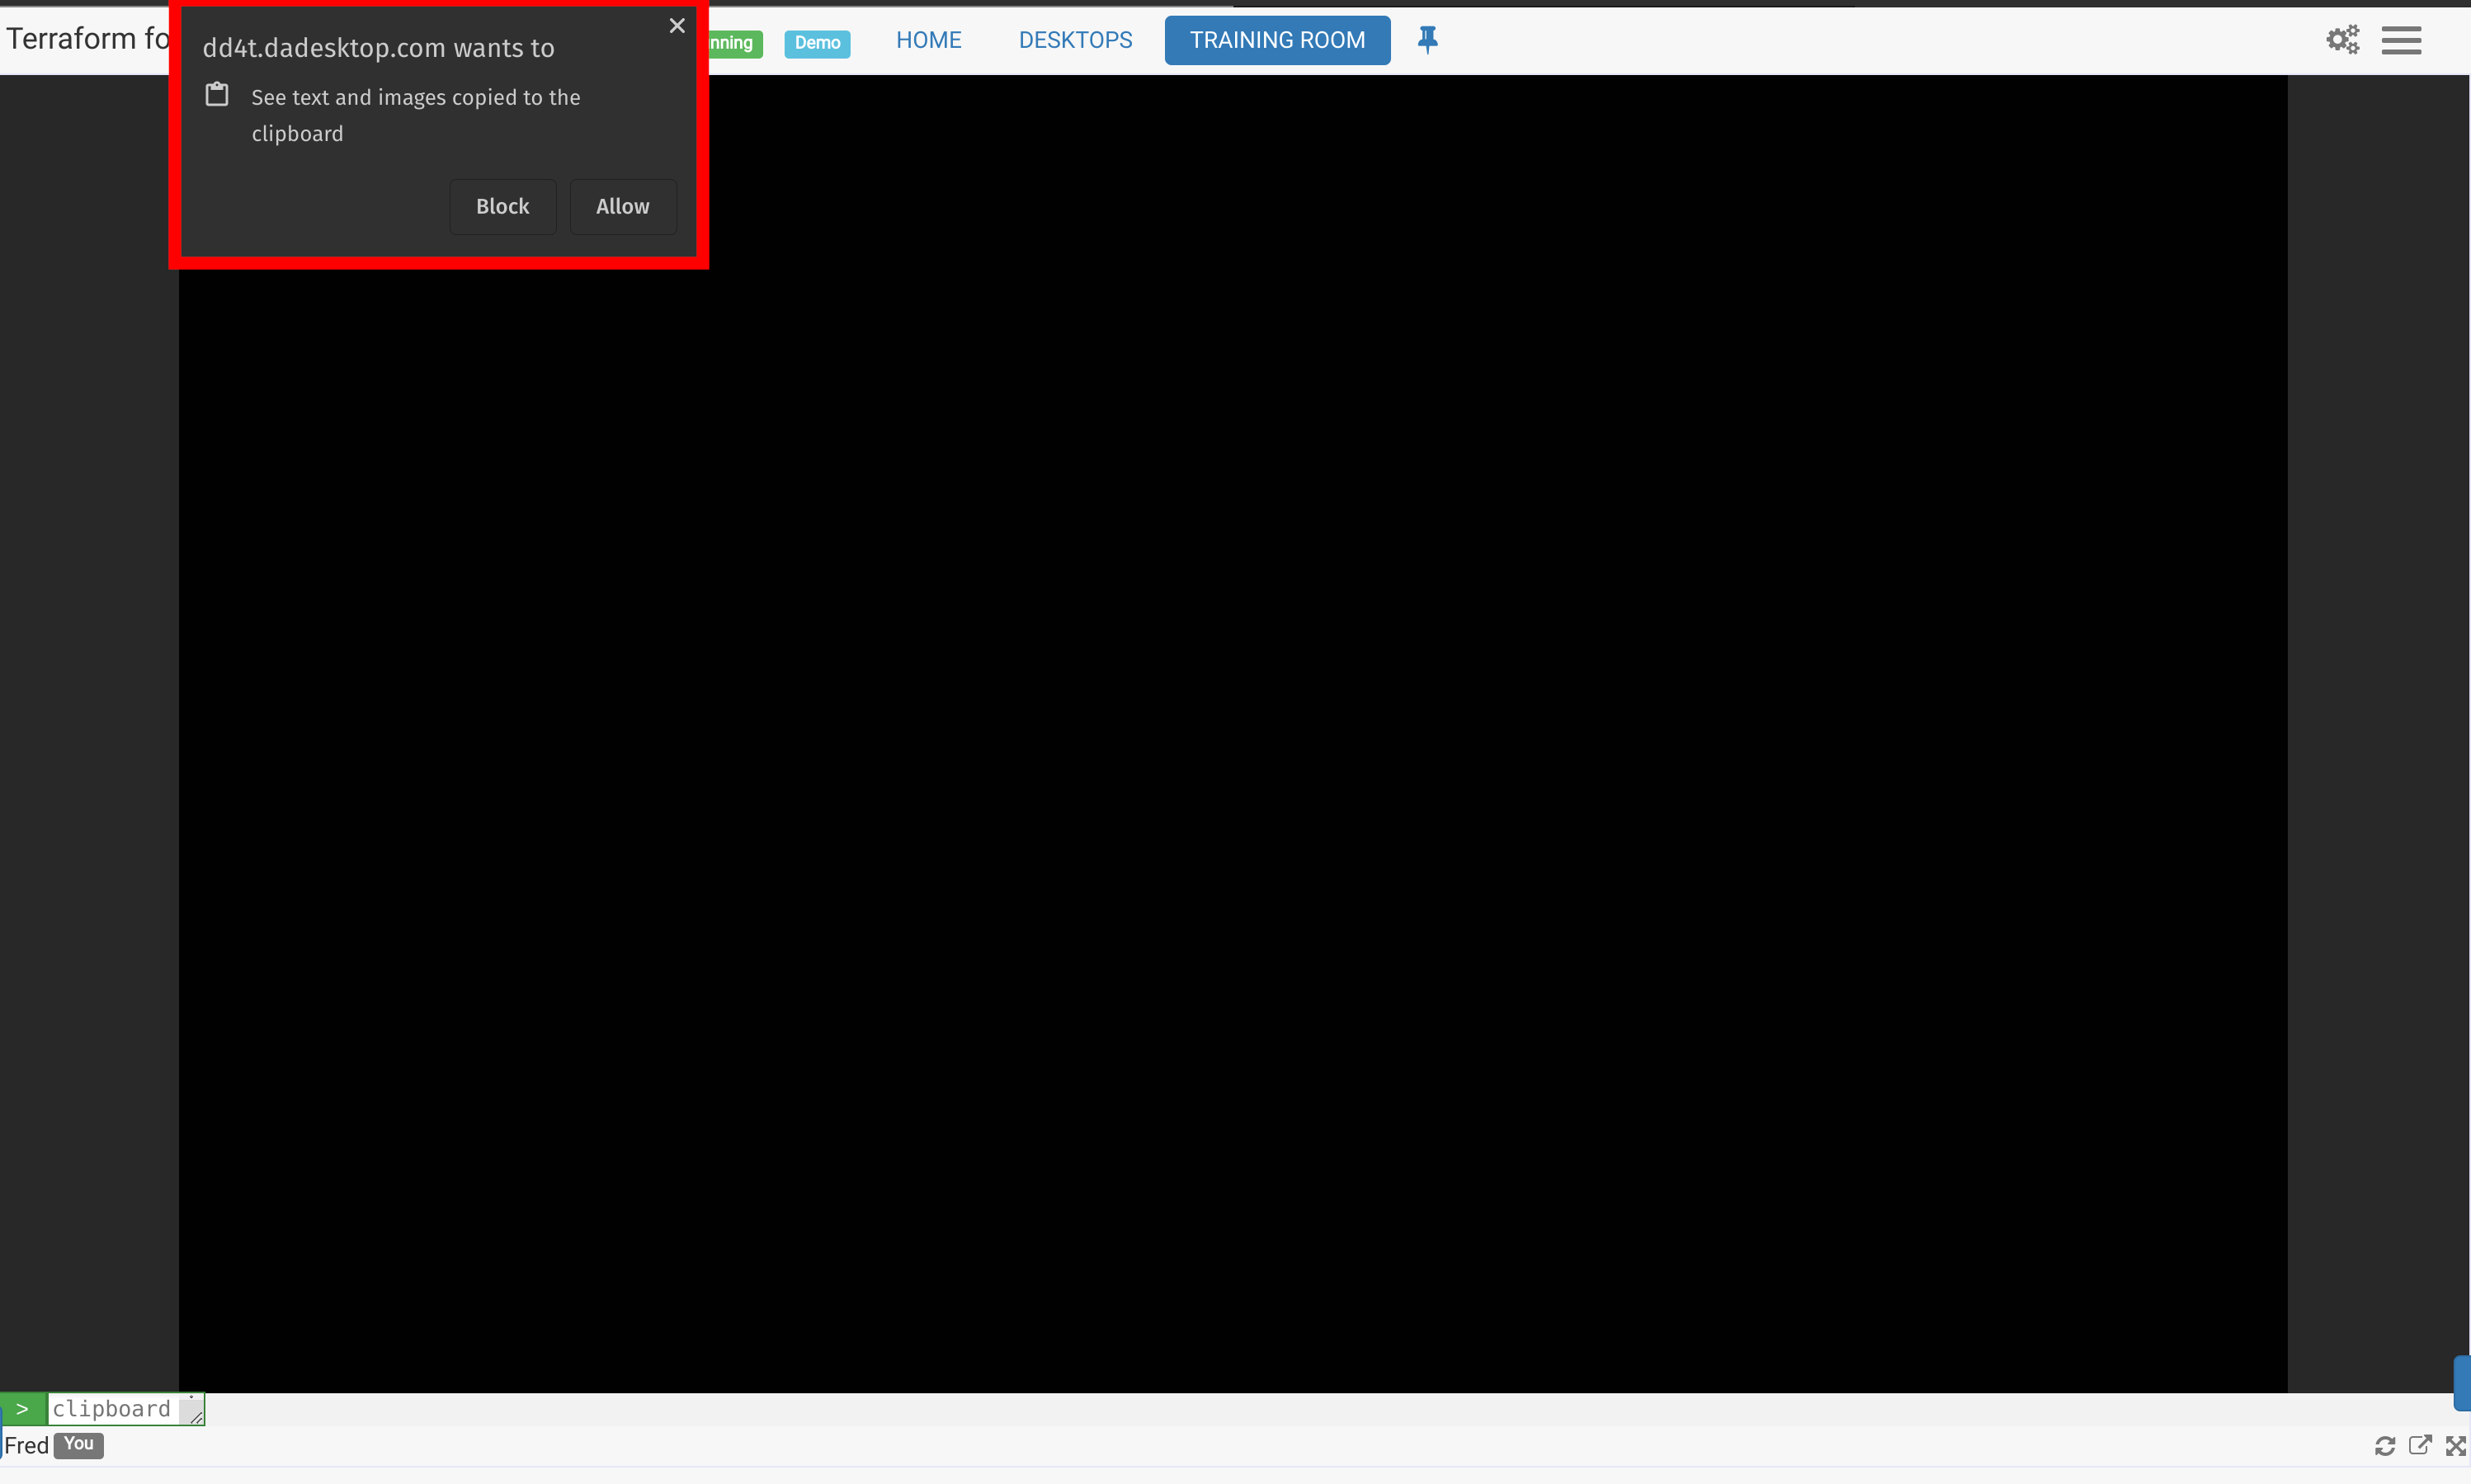
图片 03
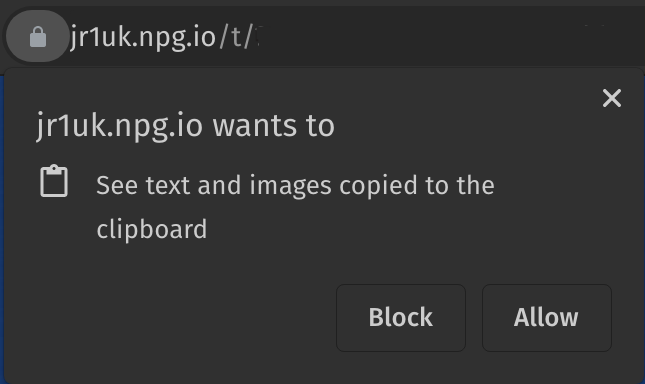
虚拟培训室将在一个新浏览器窗口中打开。将弹出一个窗口,提示您允许将内容复制到剪贴板。点击“Allow”。
图片 04
作为参与者浏览培训室
培训室在屏幕顶部显示一个选项卡,提供返回课程的链接。
图片 05
屏幕底部可用的控件
- 在这里,如果需要,您可以将屏幕“弹出”到另一台显示器上,也可以将浏览器窗口最大化至全屏。
- 同样,在屏幕右下角,如果您希望访问 DaDesktop 支持聊天,会出现一个蓝色的小切换按钮。
使用新的剪贴板功能
 为了将文本,即网址链接、函数等从您自己的计算机传输到虚拟机,我们使用“剪贴板”。
当您连接到在线课程或独立桌面时,将弹出一个类似于此的提示窗口。点击“Allow”。注意:当前使用 DaDesktop 时无法将图像复制到剪贴板。
图片 06
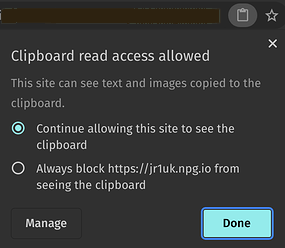 如果点击地址栏上的小剪贴板图标,您可以更改此站点的剪贴板设置。
使用方法
- 在 Windows 和 Linux 虚拟机桌面上,像往常一样从您的 PC 使用剪贴板复制和粘贴,即 Ctrl-C 和 Ctrl-V
- 在 Mac 主机上,像往常一样复制,然后按 Shift + Ctrl + V 或鼠标中键单击以进行粘贴。
图片 07
如果您在使用此功能时需要进一步支持,请与我们联系。
原始剪贴板(仅用于与新剪贴板不兼容的浏览器,如 IE,或作为备用)
- 要在您的机器与虚拟 DaDesktop 机器之间复制文本,请在屏幕左下角的剪贴板区域键入或粘贴。
-
在虚拟机上,单击鼠标中键(或鼠标滚轮)将剪贴板内容粘贴到桌面。这适用于 DaDesktop 中任何可以输入文本的位置。假设您使用的是标准的 Linux DaDesktop 虚拟机。
Mac 用户 - 使用 Command c 或 ⌘ c(复制) Command v 或 ⌘ v(粘贴)。一旦粘贴到 dd4t 剪贴板中,在 dd4t 内部,将使用 Control X、C 和 Control V 进行剪切、复制和粘贴。 - 如果使用 Windows 虚拟机,请右键单击以从剪贴板粘贴。
要调整剪贴板区域的大小,请单击屏幕左下角的绿色和白色箭头图标。
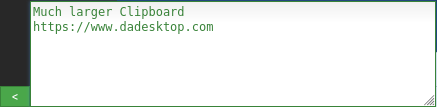
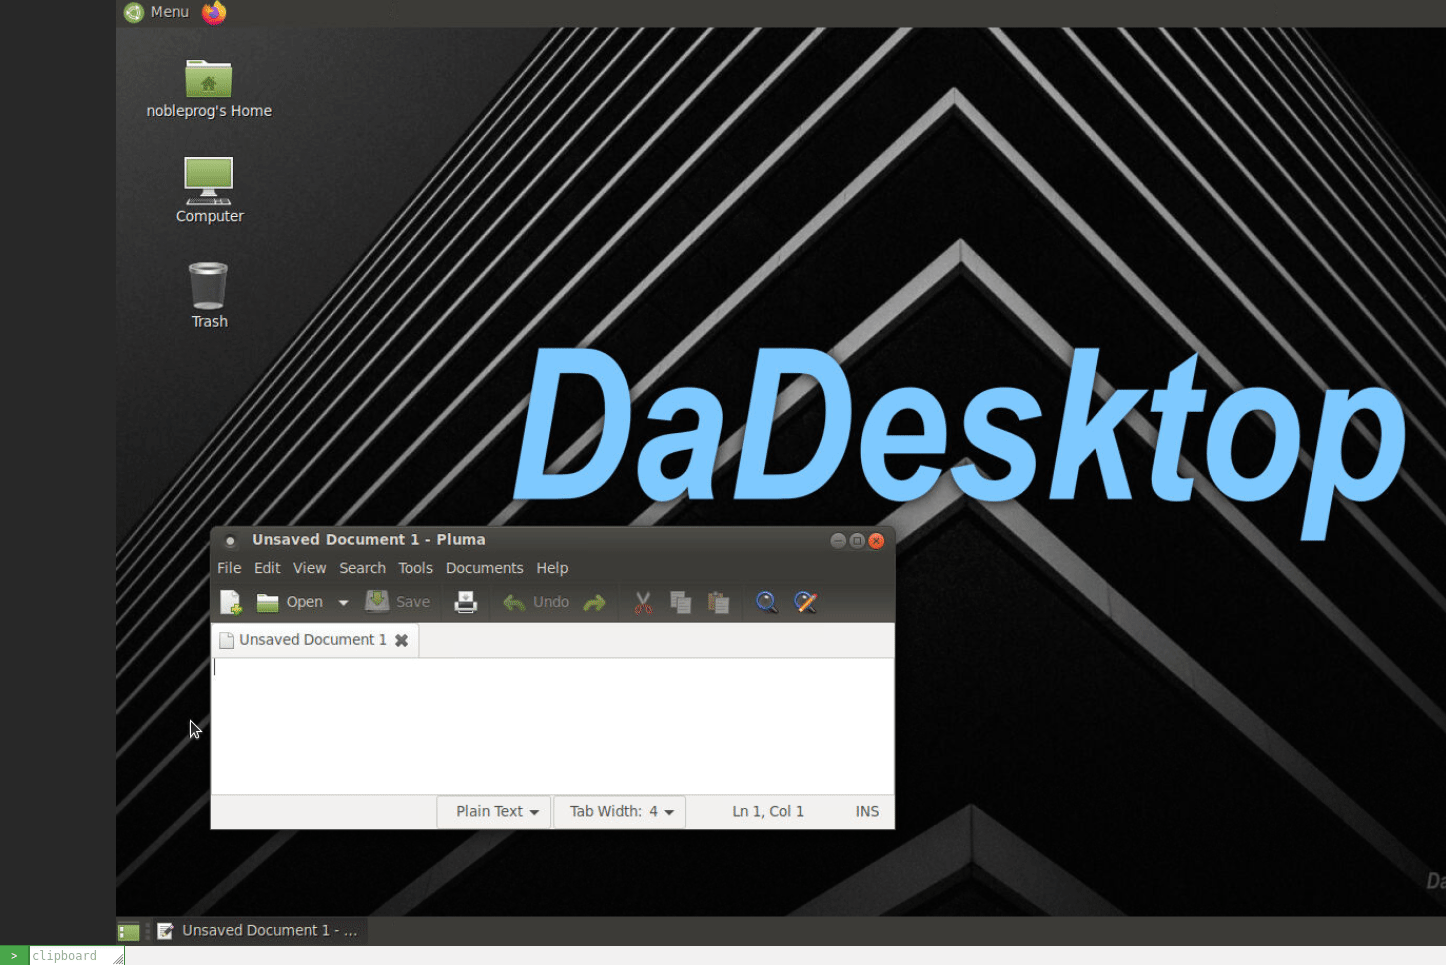
图片 08
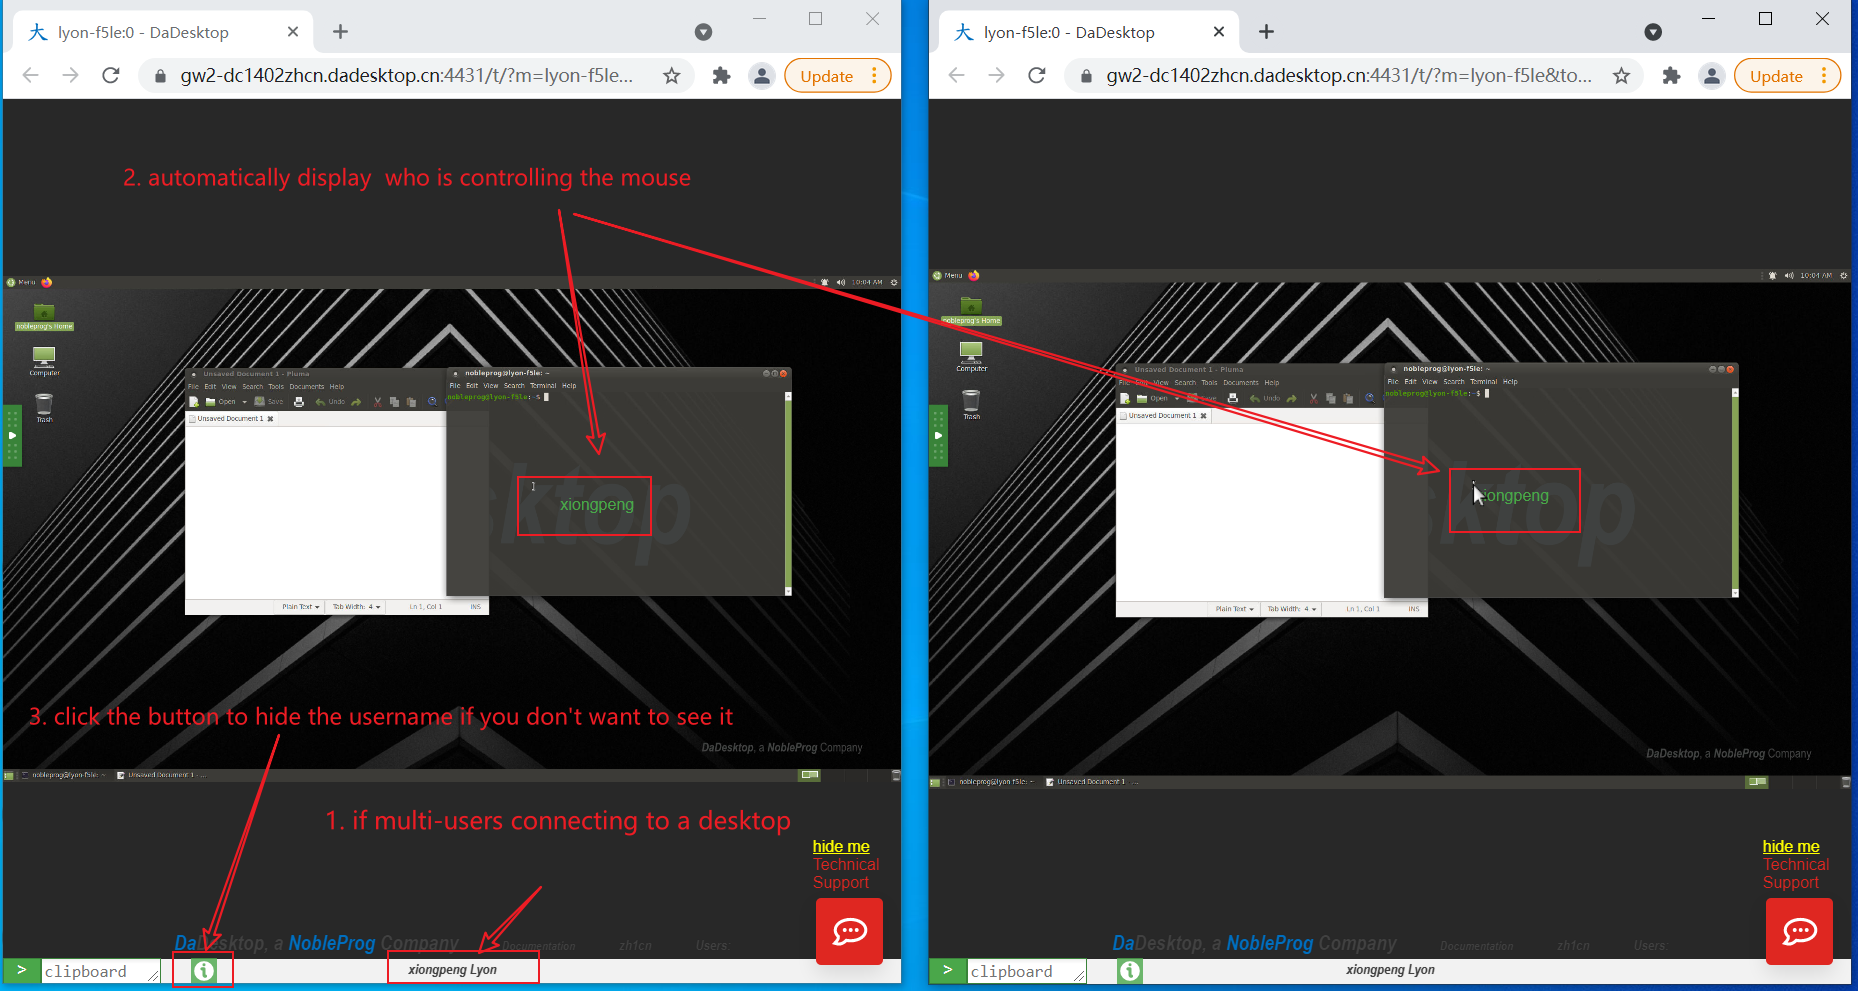
在多用户场景下使用鼠标
此功能已推出,当多个用户连接到同一桌面时,控制鼠标的用户的用户名会跟随鼠标光标显示。这对于多用户场景以及不同用户可能在不同时间控制鼠标的培训活动尤其有用。
图片 09
如果有多个用户连接到桌面,他们的用户名将显示在屏幕底部中央。

图片 10
您可以通过单击屏幕底部绿色的“Info”按钮来根据需要启用或禁用此功能。