自定义操作系统模板(Windows)
组织管理员可以创建一个自定义操作系统模板,用于快速部署远程桌面。这也有助于在您的操作系统上激活自己的许可证。
以下步骤对于成功创建镜像至关重要,请谨慎操作。
重要提示:
关于磁盘分区
1. 自定义模板仅需一个磁盘分区,或者两个分区:一个是EFI/启动分区,另一个是系统与数据分区。
2. 不支持LVM分区,请勿使用。
3. 错误的分区方案会导致磁盘自动调整大小和机器命名功能失效。
Windows
1. 安装“Red Hat VirtIO SCSI直通控制器”
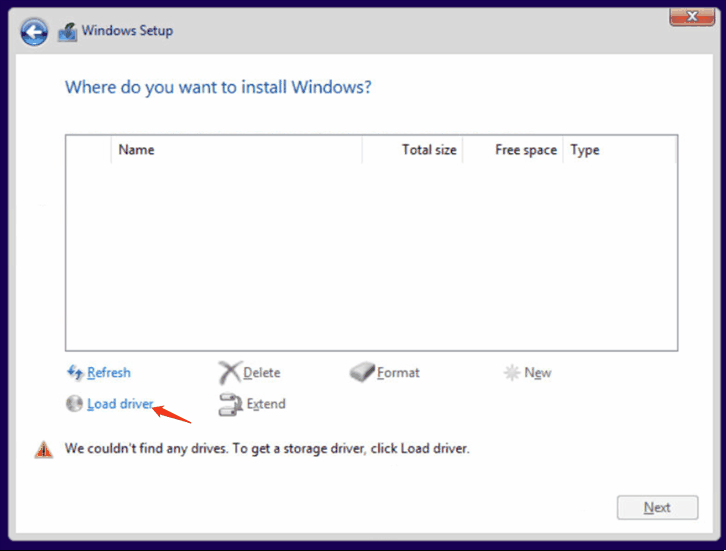
当系统询问“您想将Windows安装在何处?”时,点击“加载驱动程序”,然后选择对应的正确驱动程序。之后,您就能看到存储驱动器了。
2. 初始设置
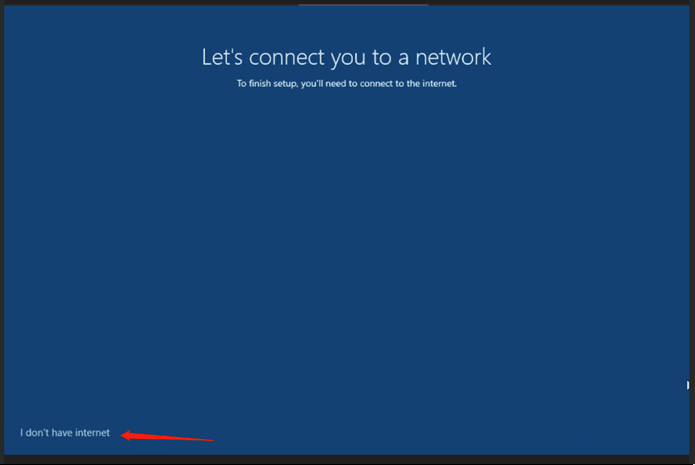
当出现“让我们连接到网络”提示时,点击我没有网络连接。
当出现“更多发现内容…”提示时,点击继续使用受限设置。
任意用户名,但不设置密码。
3. 安装Virtio-win驱动和客户机代理
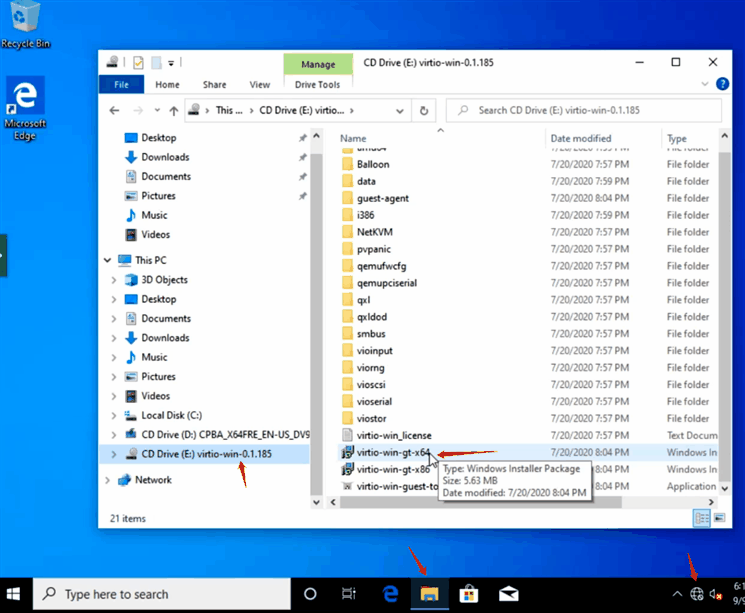
机器启动且登录后,转到CD驱动器E,执行Virtio-win-guest-tools来安装virtio驱动程序,以及spice vdagent和qemu guest agent,一直点击下一步和确定即可完成安装。
4. 禁用休眠
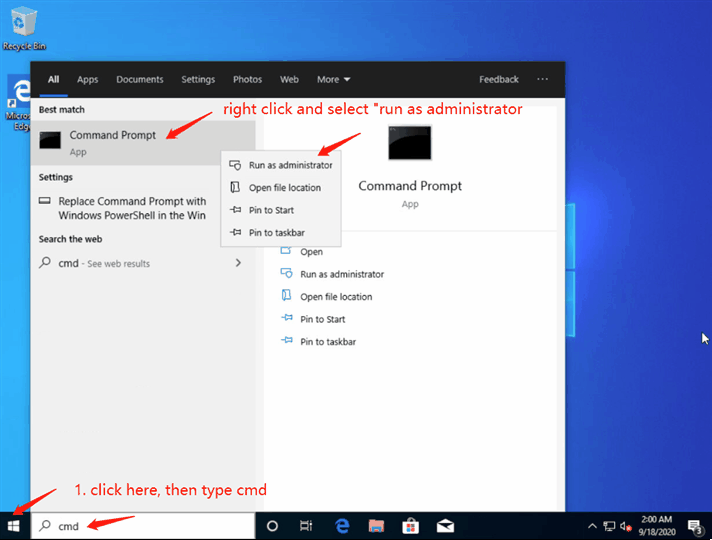
右键点击“命令提示符”,选择“以管理员身份运行”,输入“powercfg.exe /hibernate off”并回车。
5. 启用无提示关机/重启Windows 10
在注册表编辑器中,导航至以下键值HKEY_USERS\.DEFAULT\Control Panel\Desktop。
新建一个名为AutoEndTasks的字符串值,并将其数值设置为1。
6. 检查所需服务是否存在,并设置为“自动启动”
- Spice-Vdagent:用于支持qemu vnc剪贴板
- BalloonSerivce:用于客户机内存使用统计


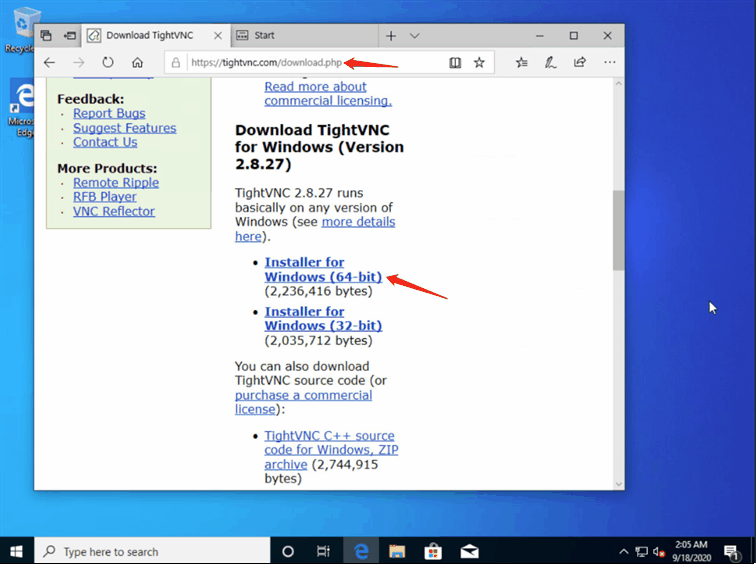
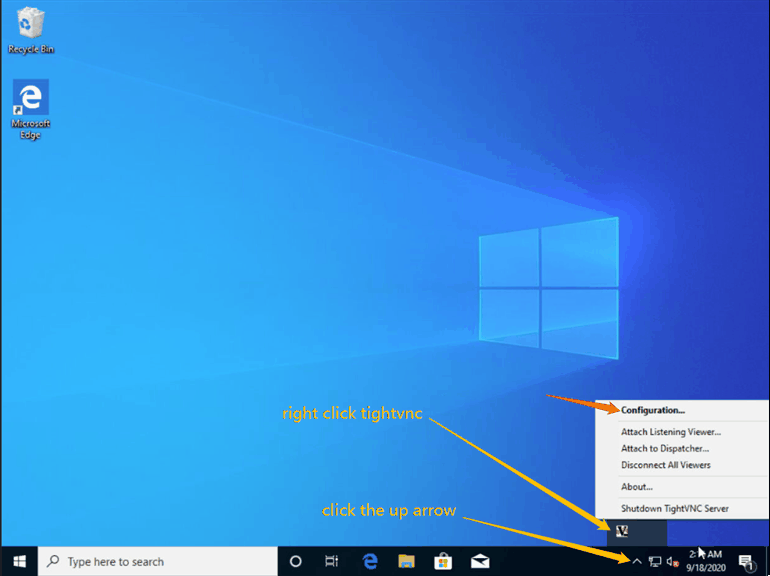
7. 安装并配置Tightvnc以支持正常的VNC连接
前往 https://www.tightvnc.com/download.php 下载适用于Windows的TightVNC安装程序。
安装它。在完成安装时禁用身份验证。
打开“TightVNC服务配置”并进行配置
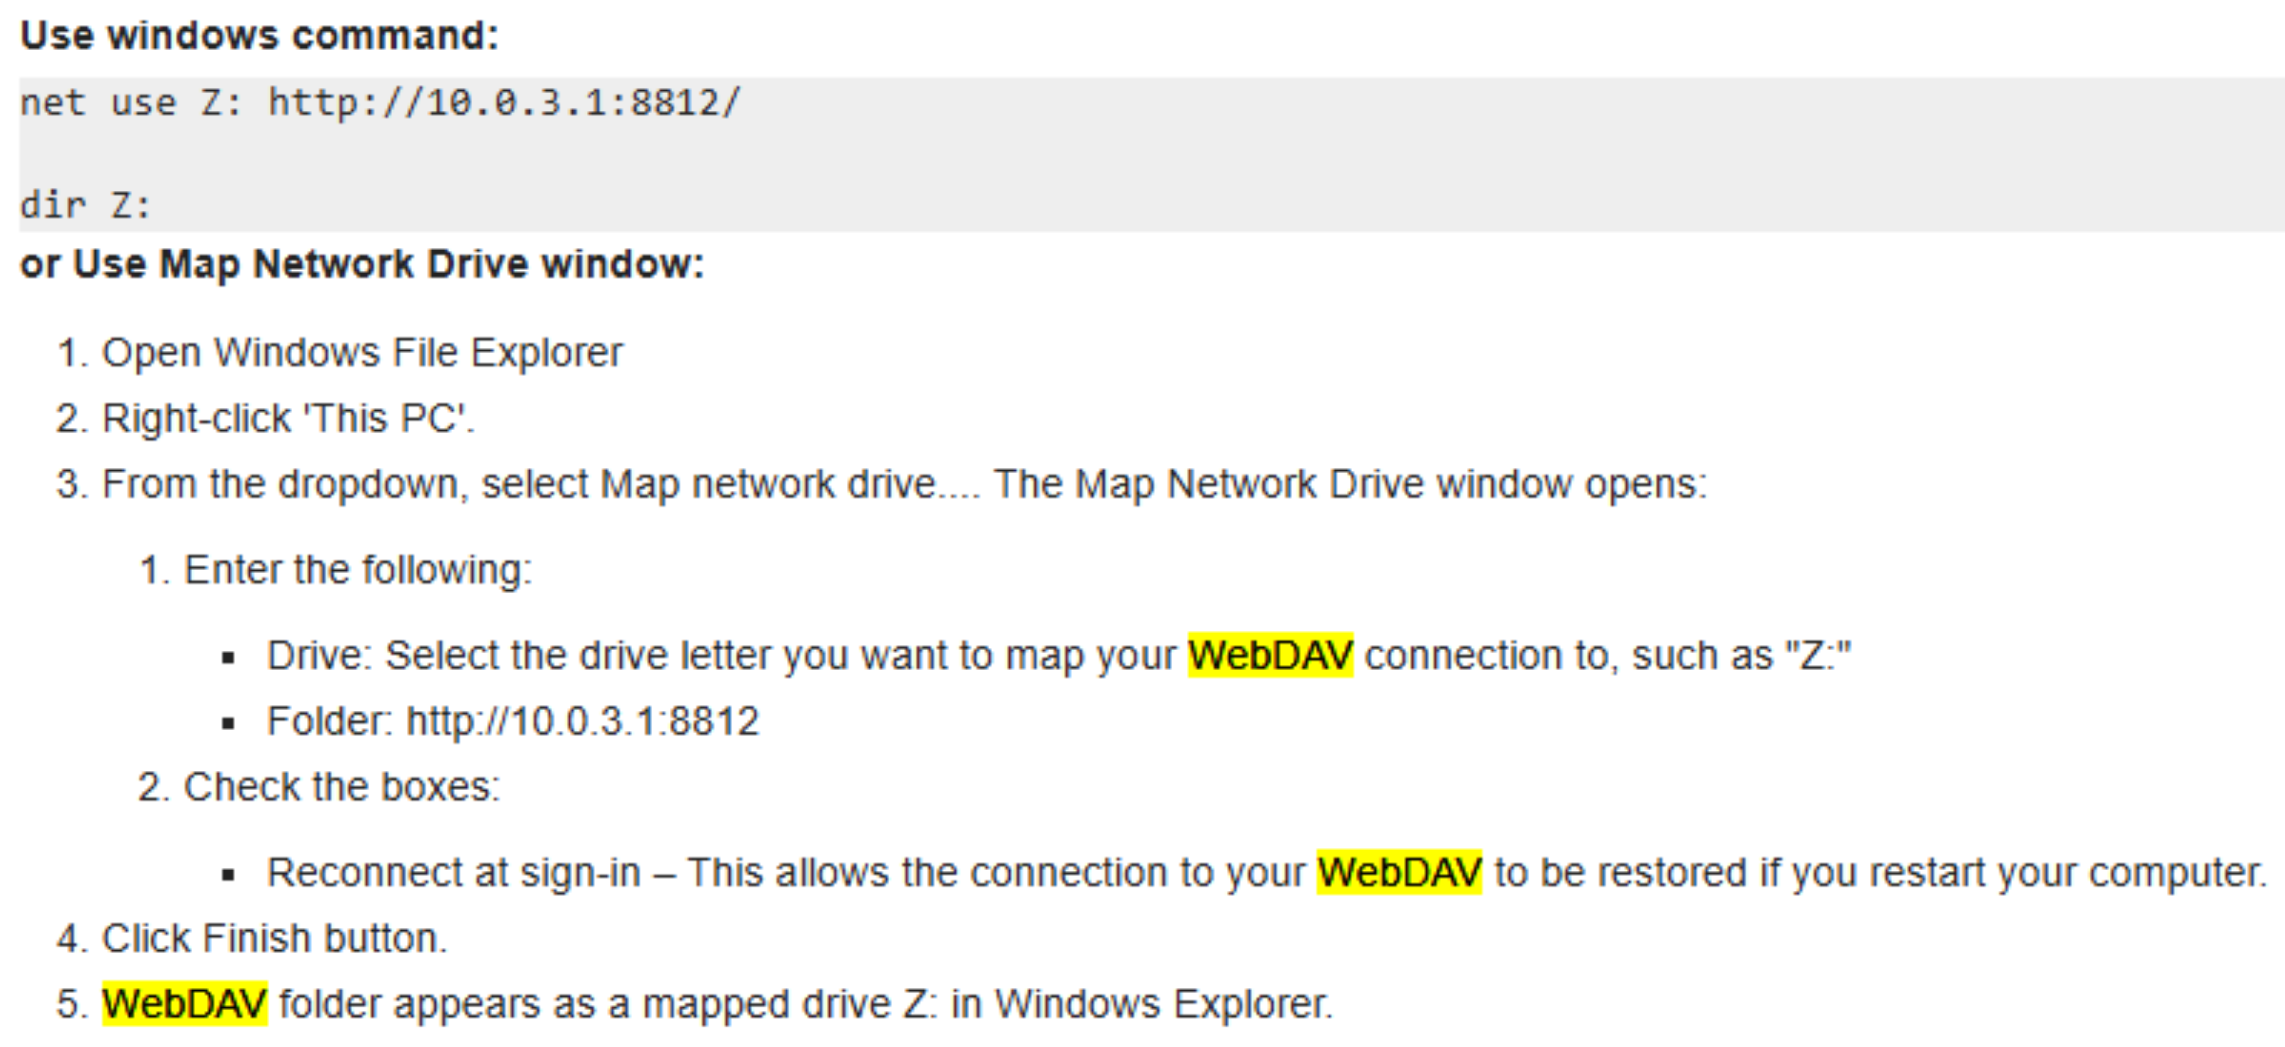
8. 启用共享驱动器
共享驱动器允许在培训课程中,云桌面之间或用户本地PC与云桌面之间共享文件。此功能基于WebDAV文件共享技术。你必须先映射硬盘才能使用。操作步骤请参见下方截图。
9. 正确关闭Windows
点击左下角Windows图标 -> 电源 -> 关机
请注意
如需添加额外的可选功能,比如
- DDWebdav,用于将培训师的内容文件夹同步到每位参与者的机器;
- 或DDUpload,用于便捷地将文件上传到DaDesktop虚拟机内;
请联系DaDesktop技术支持。